Email Piping
With the Email Piping feature, you can convert e-mails sent to e-mail addresses of specified departments into support tickets and communicate with your customers more easily and practically through the support system.
Content Map:
Activation
- Follow the path "Support > Tickets" in your administration area.
- Click the "Settings" button in the upper left corner of the page that opens.
- On the page that opens, click on the "Email Piping" tab.
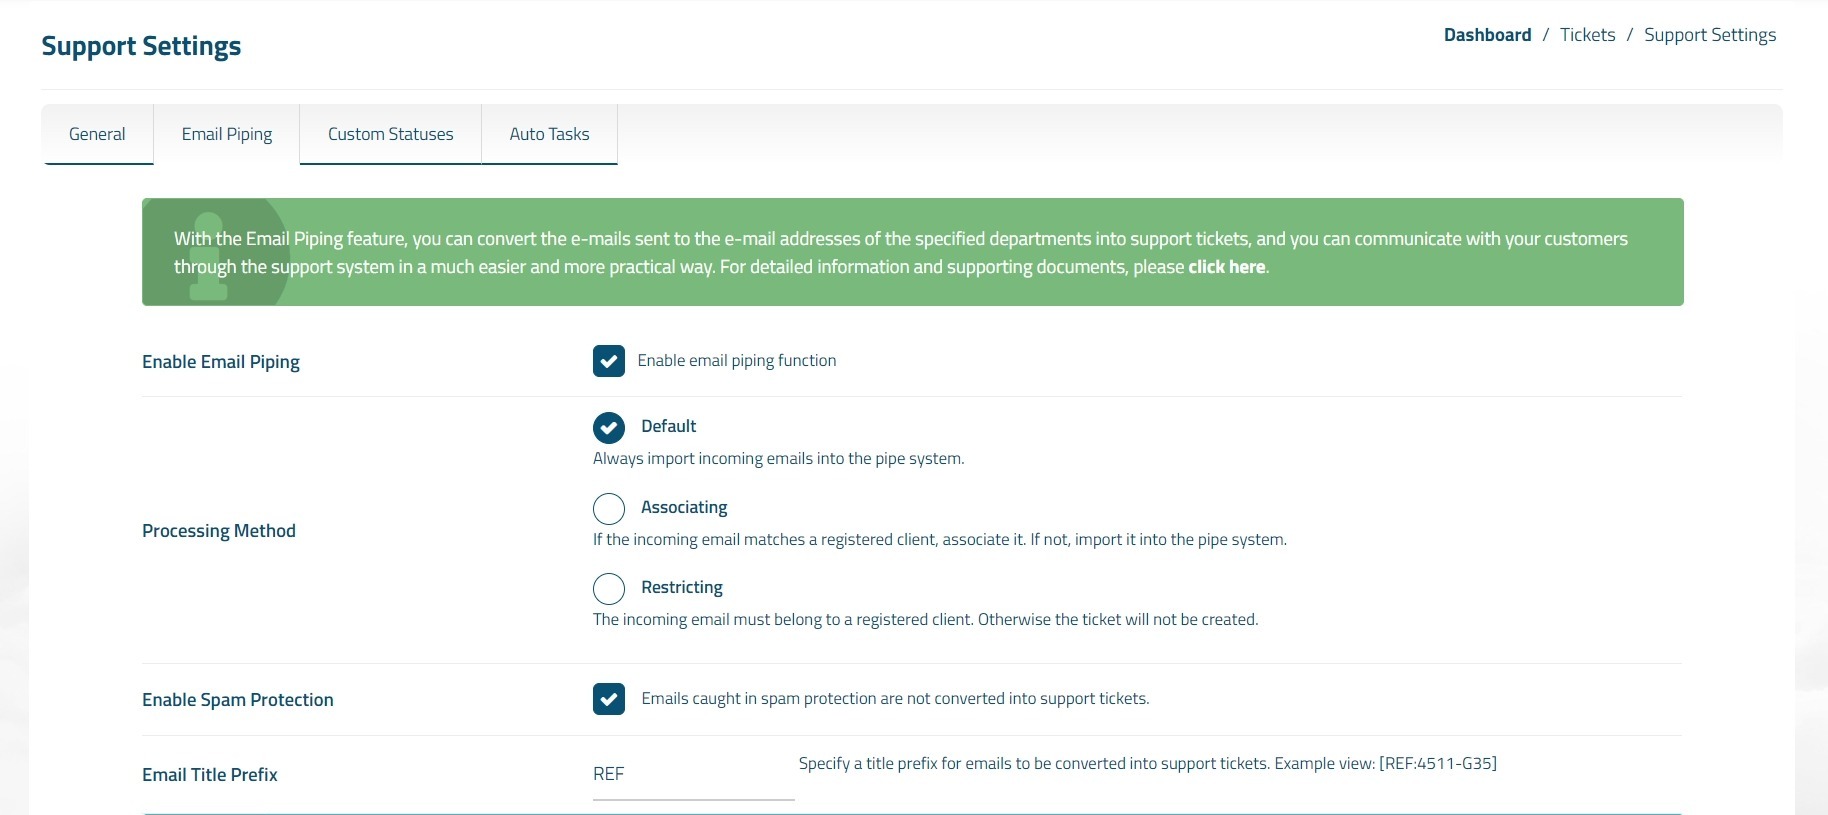
- Check the "Enable Email Piping" box on the page that opens.
Configuration
With the settings below you can configure the email piping system according to your own wishes:
Enable Email Piping : Allows to enable the Email Piping system.
Processing Method : It determines how incoming e-mails will be processed. There are sub-settings as follows:
- Default : Incoming emails are always imported into the pipe system.
- Associating : If the incoming e-mail matches a registered customer, it is associated. If not, it is imported into the pipe system.
- Restricting : The incoming e-mail must belong to a registered client. Otherwise the ticket will not be created.
Enable Spam Protection : You can enable it to filter incoming emails through the spam firewall. In this way, you are protected from unnecessary, advertising and malicious messages. Thanks to spam protection, incoming emails to the Email Piping system are not converted into a support ticket.
Email Title Prefix : You can specify an optional prefix for the email title to be used in the emails processed in the Email Piping system. Example view: [REF:4511-G35] You can change the word REF in this example as you wish.
Departmants
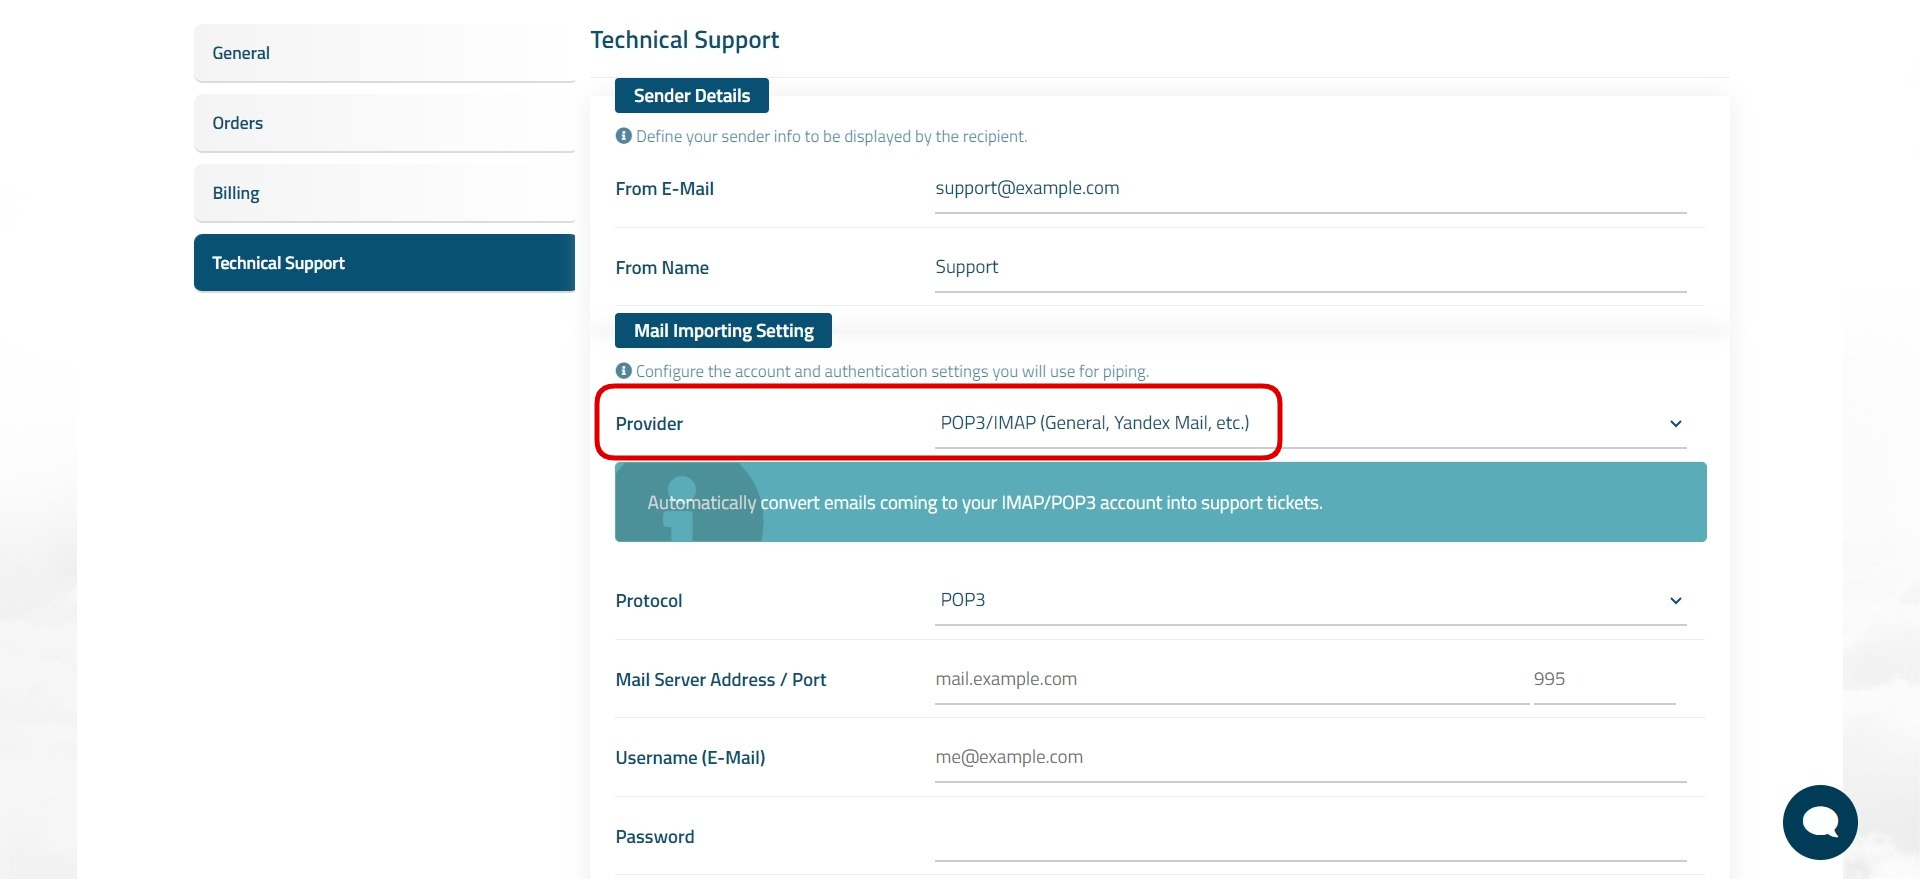
In addition to the above settings, there are some settings that need to be made for each support department. These settings allow you to determine the sender information of the message to be sent by you and to determine the provider or method through which the mails sent to you are imported into the pipe system.
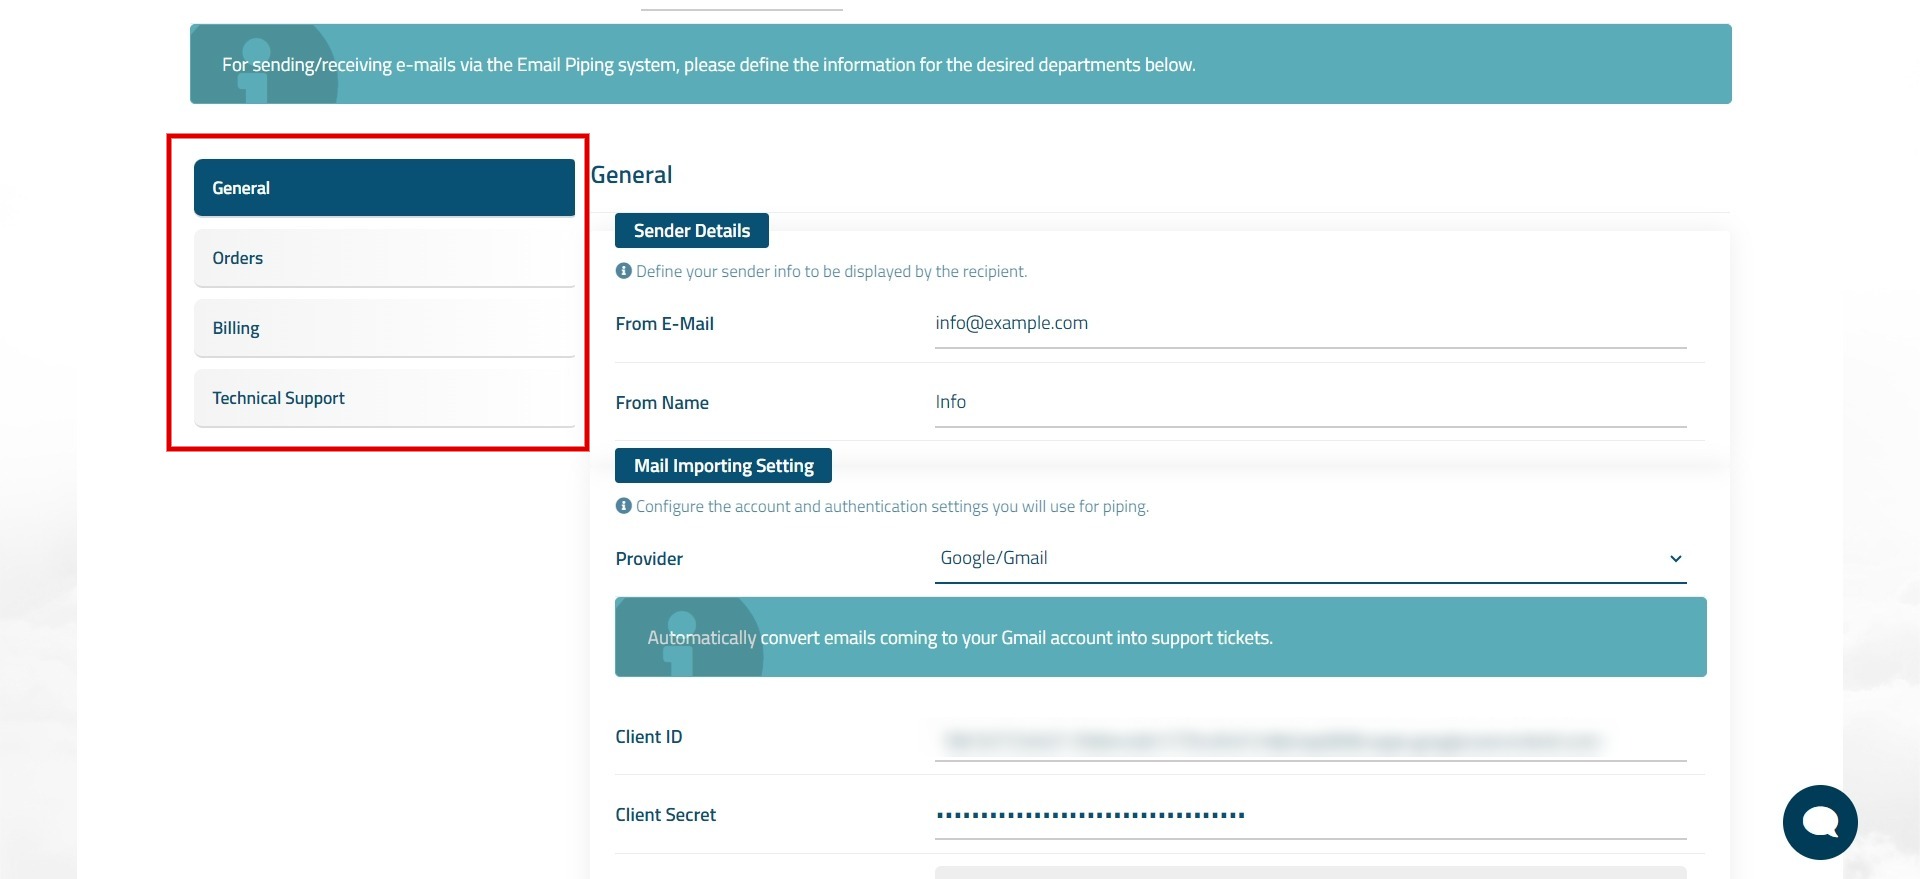
Select Department
Select a department from the left side of the relevant section:
Setting Sender Details
Define the following fields in the "Sender Details" area on the right side of the relevant section:
- From E-Mail : This is your email address that will appear in the sender field of the messages you send.
- From Name : This is your sender name that will be displayed in the sender field of the messages you send.
Mail Importing Setting
In the "Mail Importing Setting" field you need to set the service/provider you use for your inbox. The following options are available.
If you are forwarding mails to a different e-mail address in your inbox, make sure that you enable the "leave a copy on the server" function or do not use the "delete from server after forwarding" function. Otherwise, the incoming mail will be deleted from your server and the piping system will not be able to import the mail and tickets will not be created.
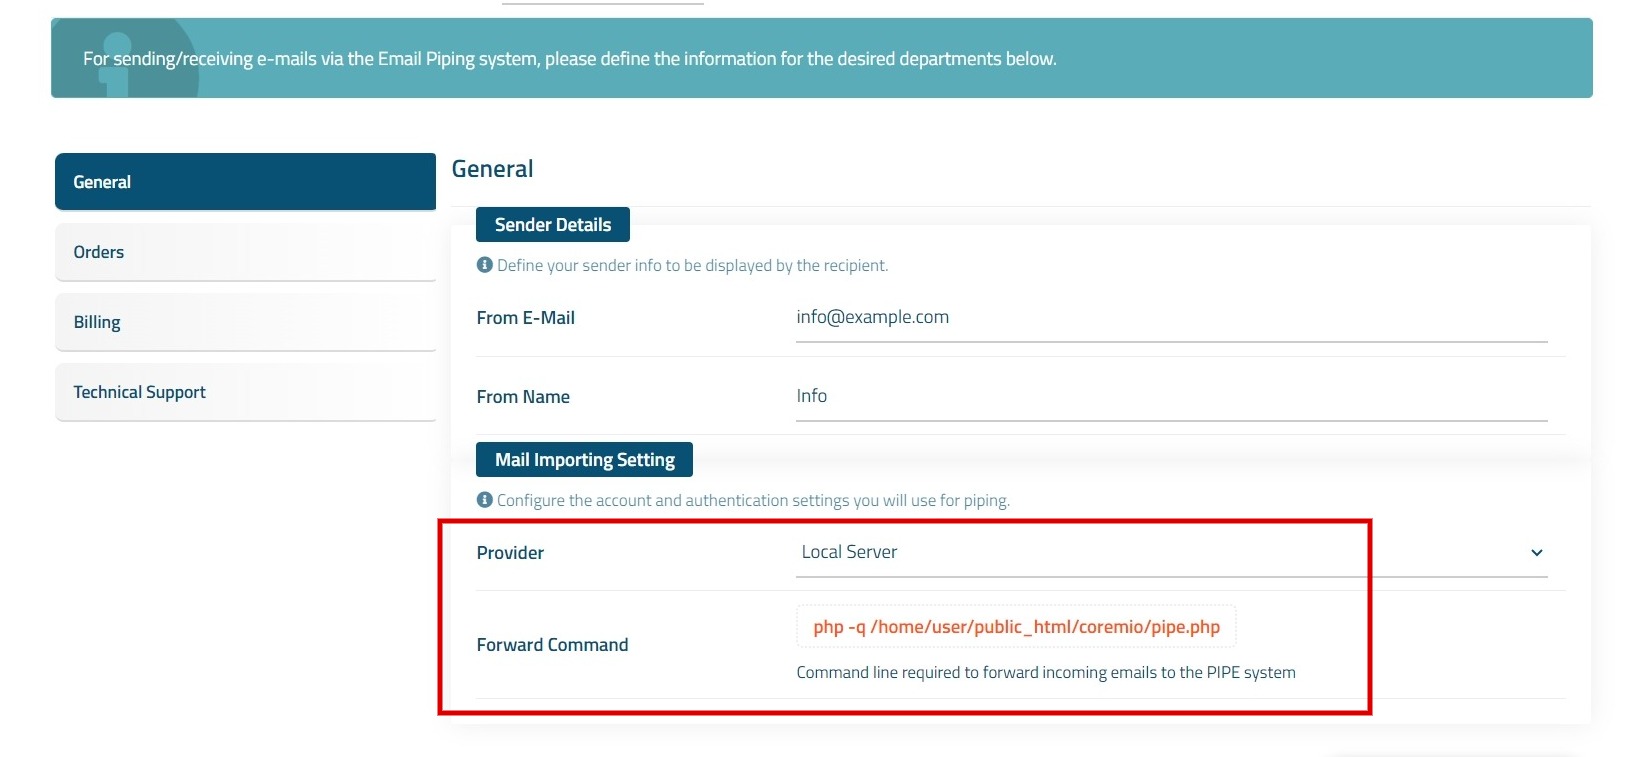
Local Server
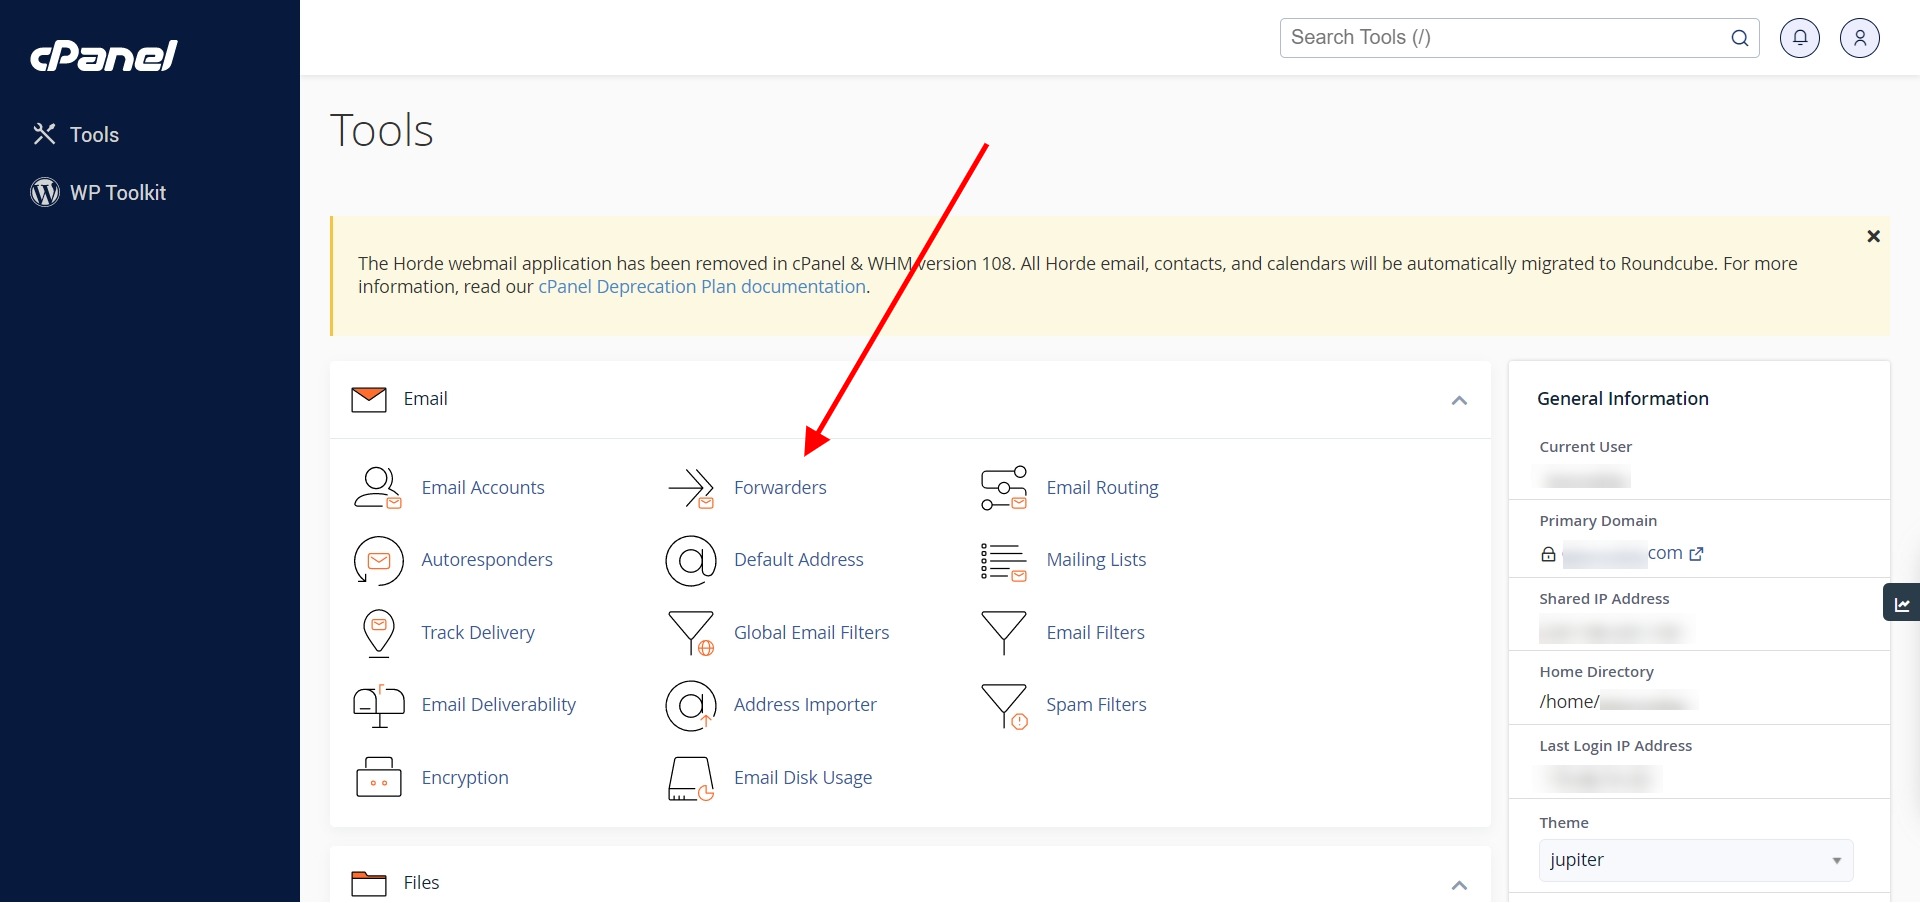
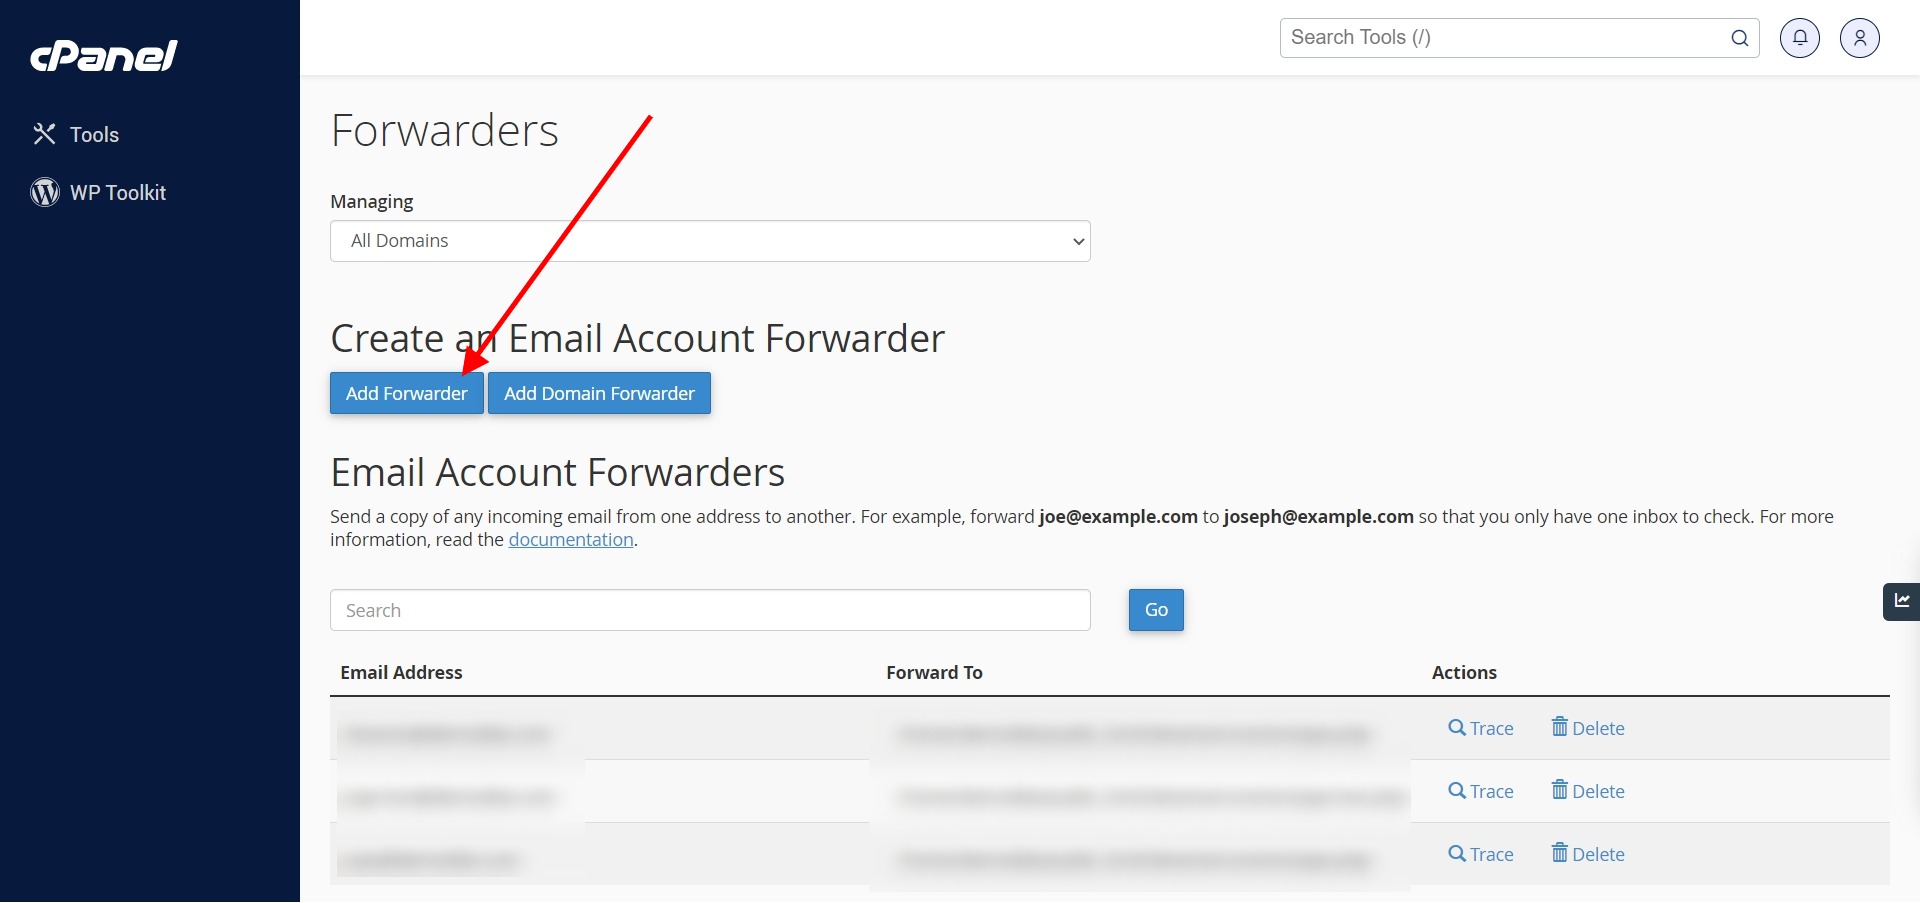
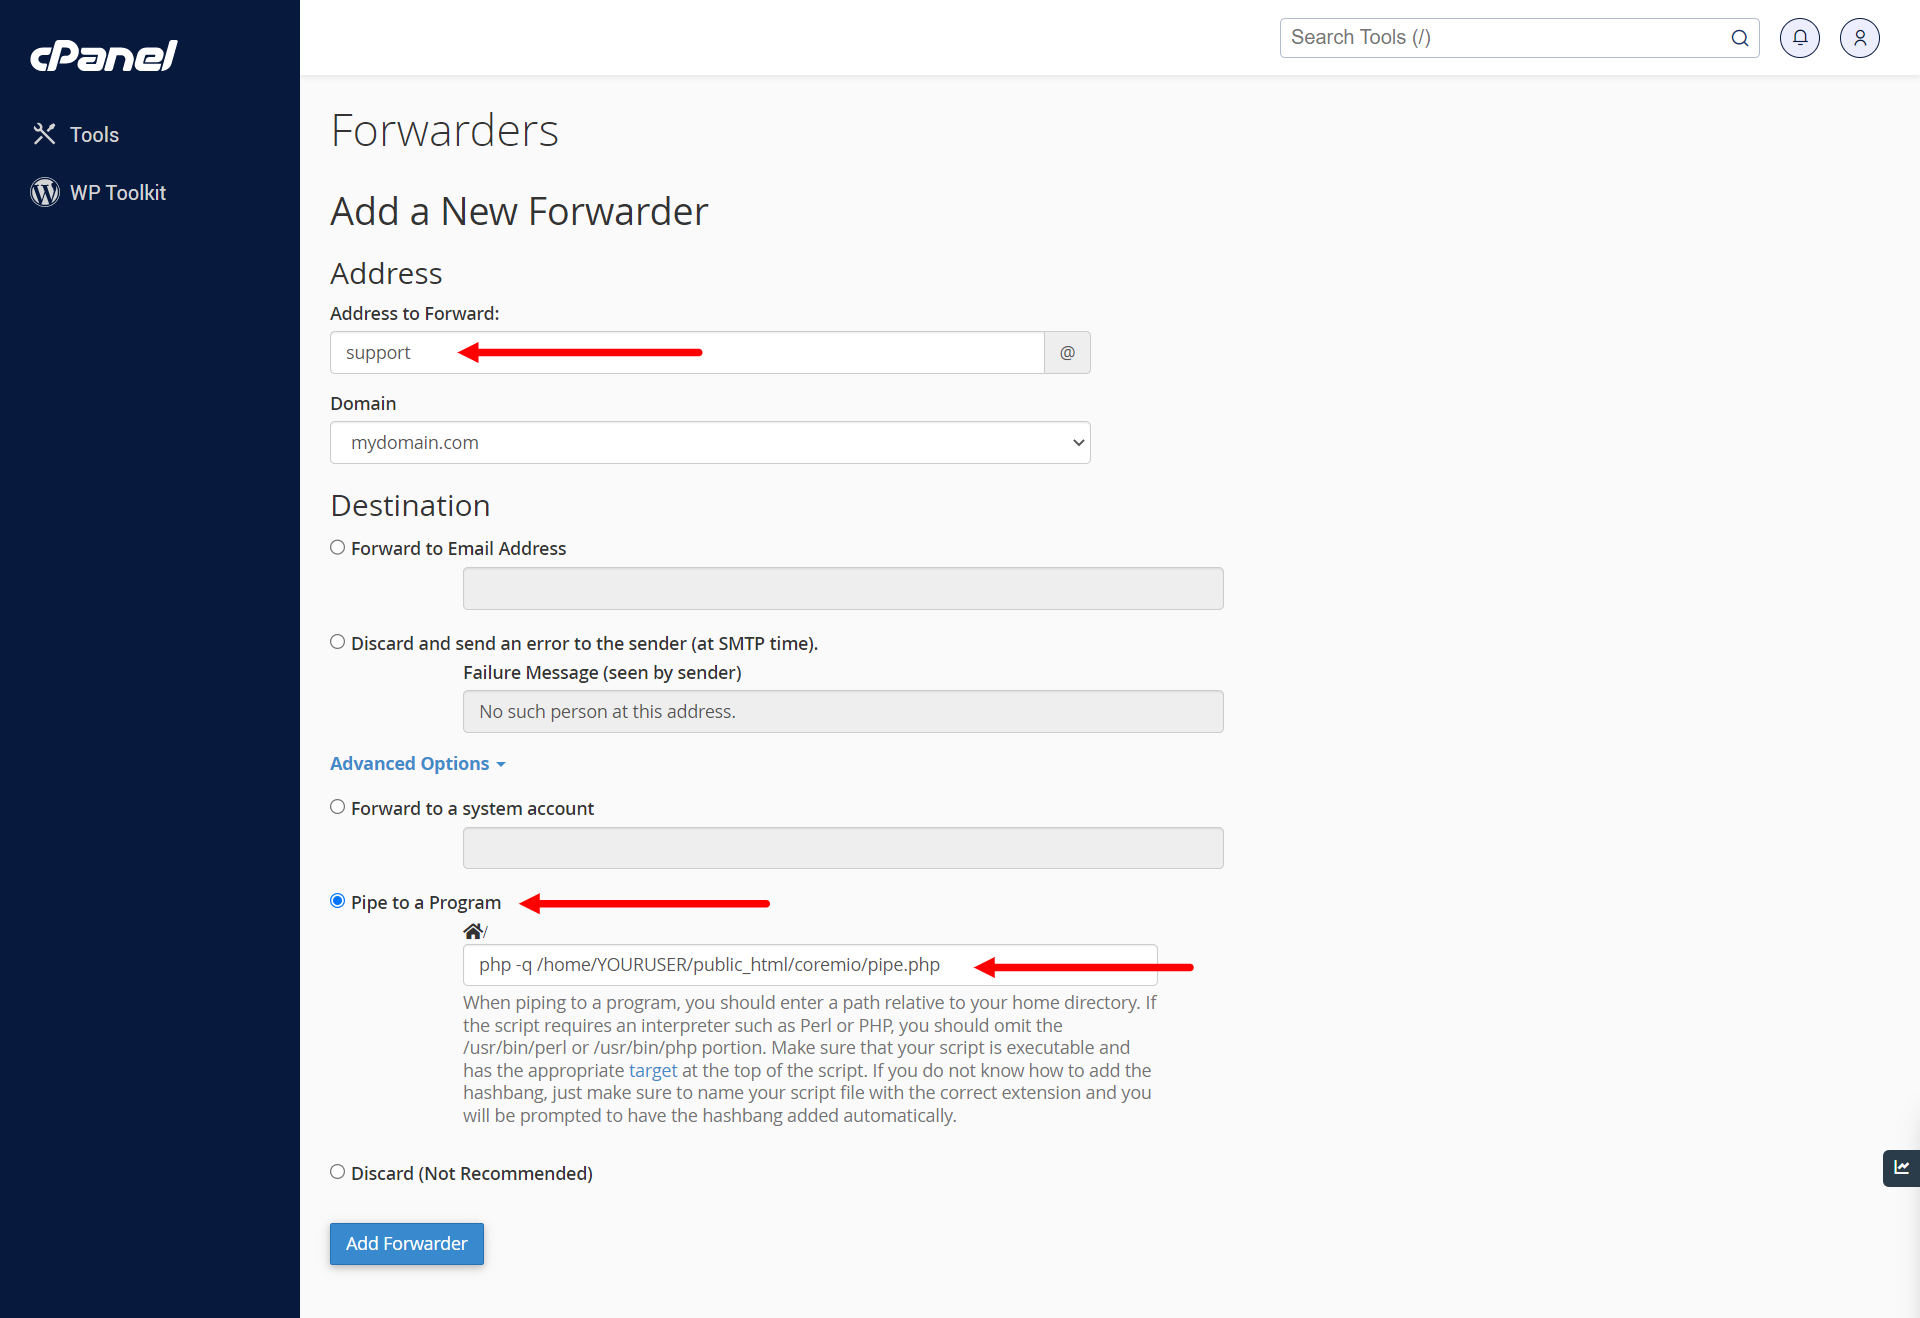
In this option, the e-mails received to the e-mail address on the server where you host your WISECP are transferred to the software with the forwarding command and converted into tickets. When you select this option, "Email Forwarding Command" appears at the bottom and you need to define this command in the "Pipe to a program/system" field in the email forwarding section of your hosting panel. You can get information on how to do this by contacting the support of your hosting panel.
Google/Gmail
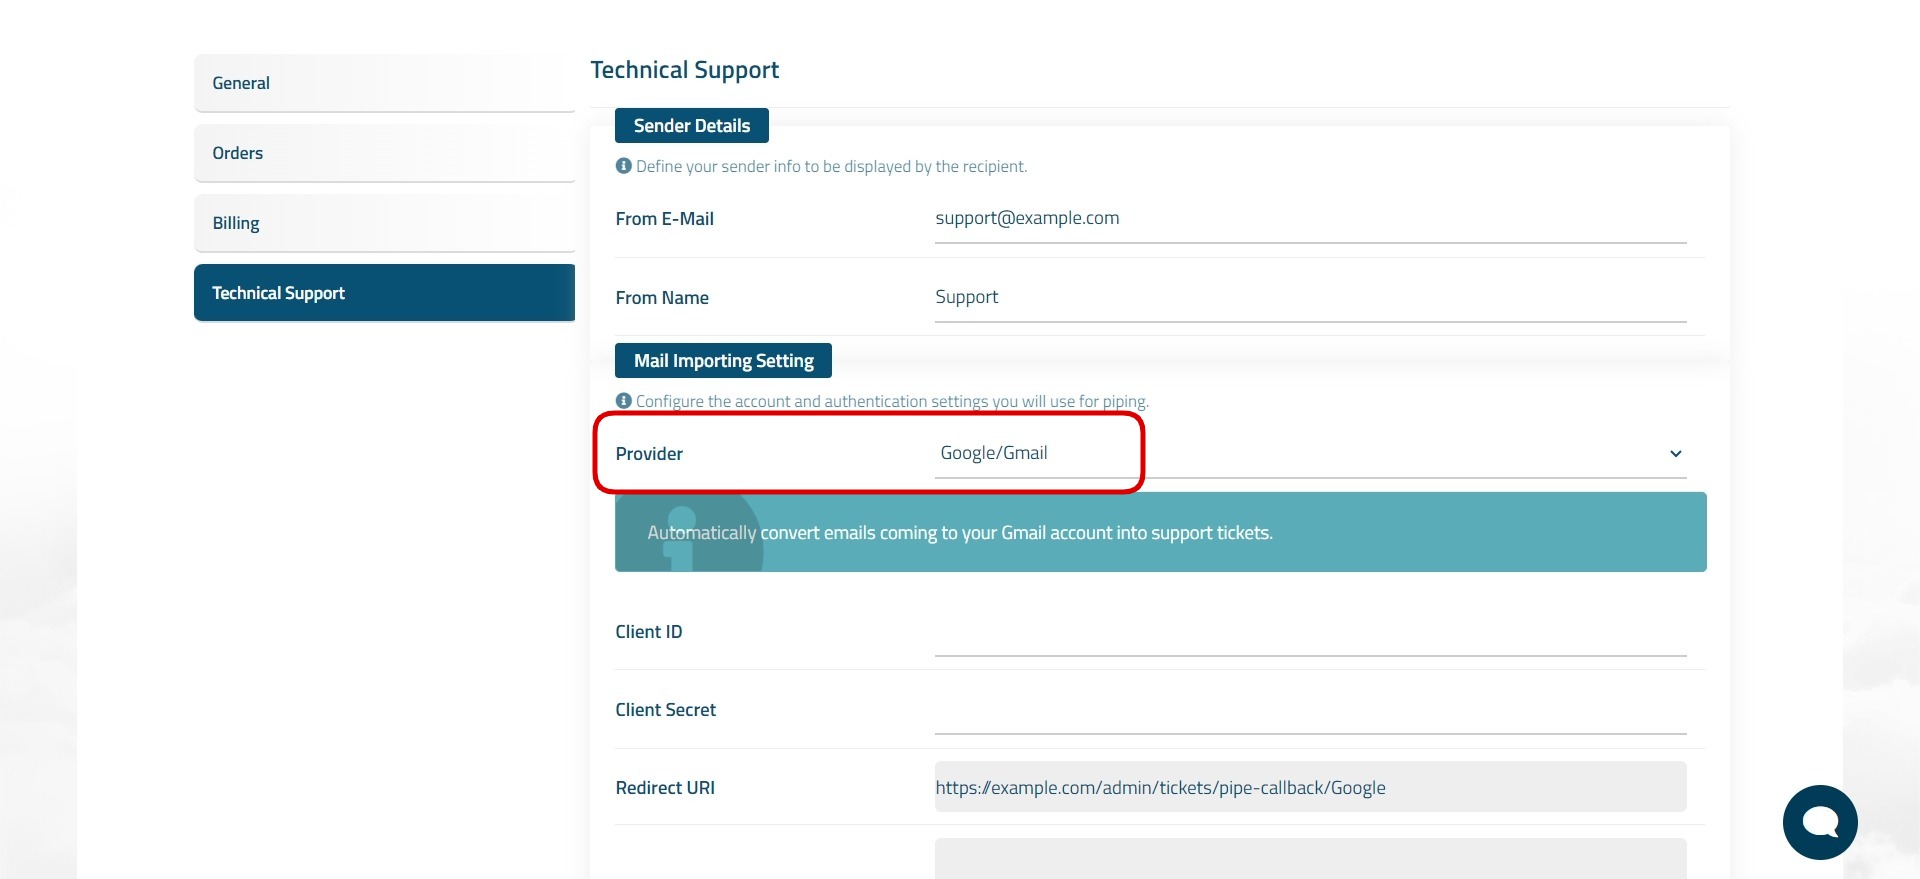
You should choose this option if you manage your incoming mail through Gmail. Google uses the "OAuth2" authentication method to read emails through Gmail. Therefore, you should follow the steps below to define the necessary information.
- Log in to your Google account at https://console.cloud.google.com
- Select an existing project or create a new one from the top left of the page.
- Enter the project you created and follow the "APIs & Services > Credentials" path from the navbar menu on the left side.
- Click on the "+CREATE CREDENTIALS" button at the top of the page and select the "OAuth client ID" option.
- On the page that opens, click on the "Application type" field and select "Web application".
- Type "WISECP Pipe System" in the "Name" field displayed at the bottom, define the "Redirect URI" information in the WISECP "Mail Importing Setting" in the "Authorized redirect URIs" field and click the "CREATE" button.
- Copy the "Client ID" and "Client Secret" information displayed in the pop-up window and define them in the relevant fields in the WISECP "Mail Importing Setting".
After defining the "Client ID" and "Client Secret" information in the WISECP "Mail Importing Setting", click the "Connect" button and complete the necessary authorization process. (If you see the warning "Google has not verified this application" during the authorization process, continue the process via the "Advanced" link).
In order to use email piping via Gmail service, you need to enable "Google/Gmail API". You can enable it by visiting the link below.
https://console.cloud.google.com/apis/library/gmail.googleapis.com
Make sure that the project you created or your existing project is "Public" in your Google API console. Otherwise you may encounter authorization/permission issues. If your project appears in test mode on the link below, make it "Public". If it already appears in public mode, you do not need to take any additional action.
https://console.cloud.google.com/apis/credentials/consent
Microsoft/Outlook
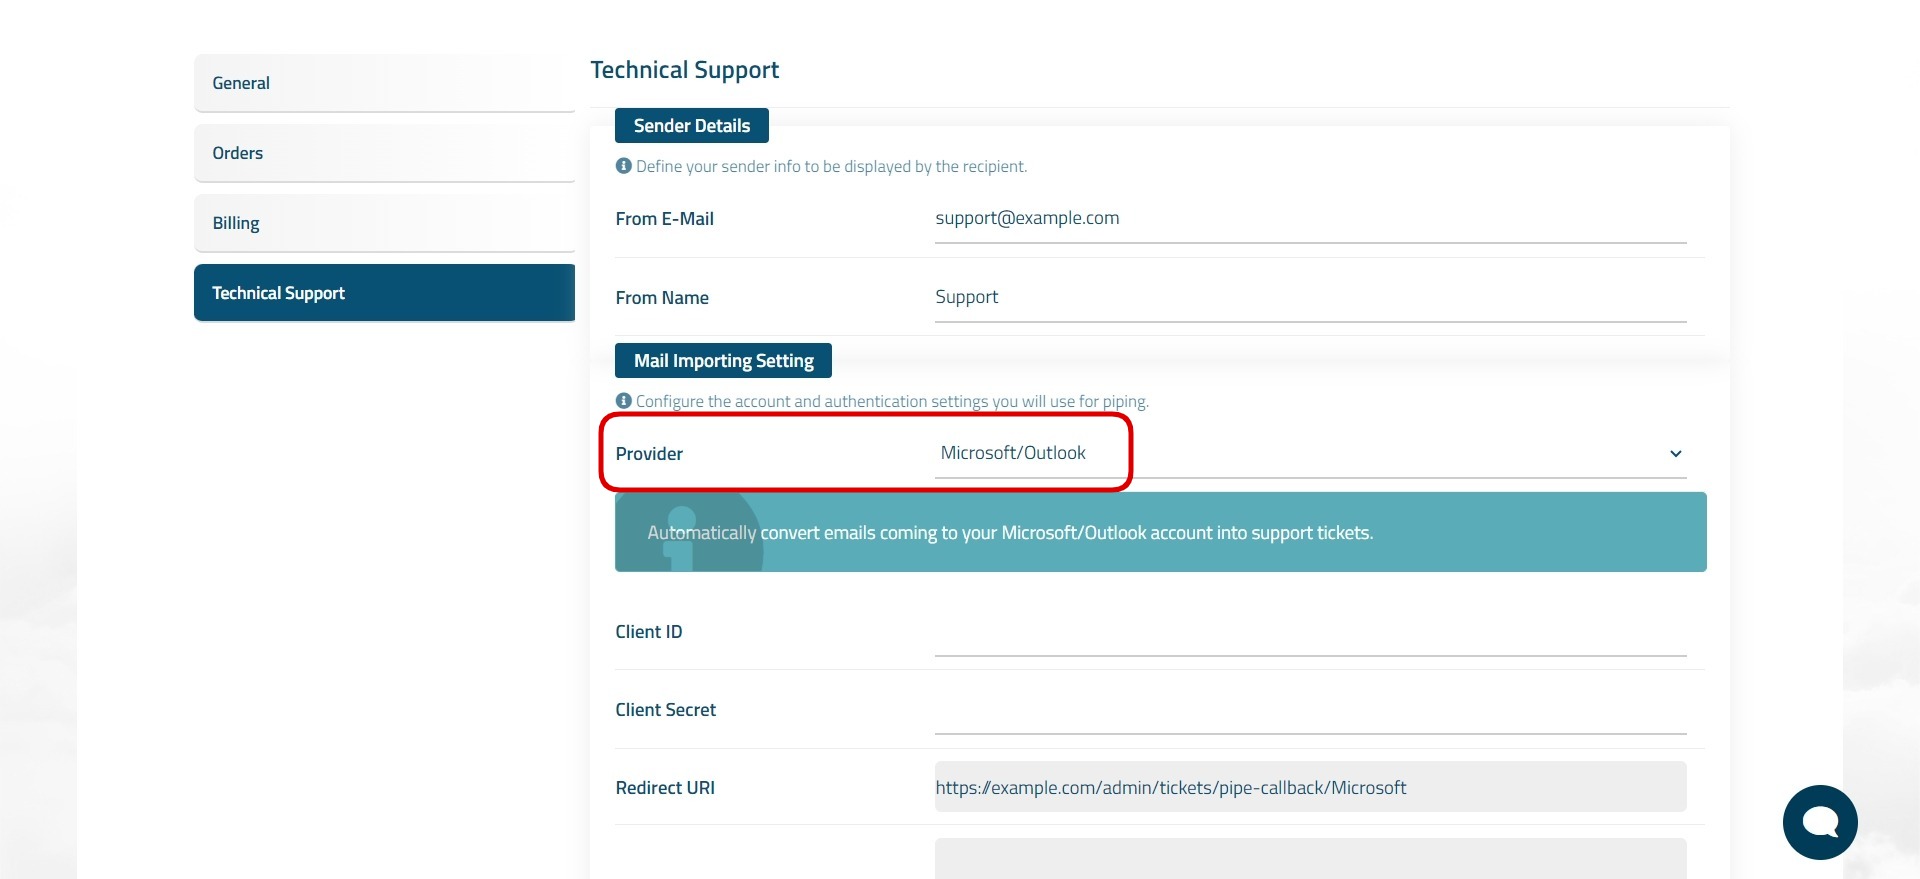
You should choose this option if you manage your incoming mail through Microsoft/Outlook. Microsoft uses the "OAuth2" authentication method to read emails through Outlook. Therefore, you should follow the steps below to define the necessary information.
- Sign in to your Microsoft account at https://portal.azure.com
- Type "Azure Active Directory" in the search bar and click on the "Microsoft Entra ID" heading in the results displayed.
- Click on "App registrations" in the menu on the left.
- Click on the "New registration" button.
- On the page that opens, in the "Name" field type "WISECP Pipe System", in the "Supported account types" field select "Accounts in any organizational directory (Any Microsoft Entra ID tenant - Multitenant) and personal Microsoft accounts (e.g. Skype, Xbox)".
- Select "Web" in the "Redirection URI" field and define the "Redirection URI" information in the WISECP "Mail Importing Setting".
- On the page that opens after clicking the "Register" button, copy the "Client ID" information and define it in the "Client ID" field in the WISECP "Mail Importing Setting".
- Click on the "Certificates & secrets" heading on the left side of the same page and click on the "New client secret" button.
- In the section that opens on the right side of the page, type "WISECP Pipe System" in the "Description" field, select "730 Days" in the "Expires" field or set your own time period and click the "Add" button.
- Copy the "Value" information on the page that opens and define it in the "Client Secret" field in the WISECP "Mail Importing Setting".
After that, click the "Connect" button in the WISECP "Mail Importing Setting" and complete the authorization process.
Yandex Mail
If you manage your incoming mails via Yandex Mail, you should choose this option. The process you need to follow is as follows.
- Log in to your Yandex account at https://passport.yandex.com
- Click on the " Cog" icon at the top right of the page.
- Click on the "All settings" link in the pop-up window.
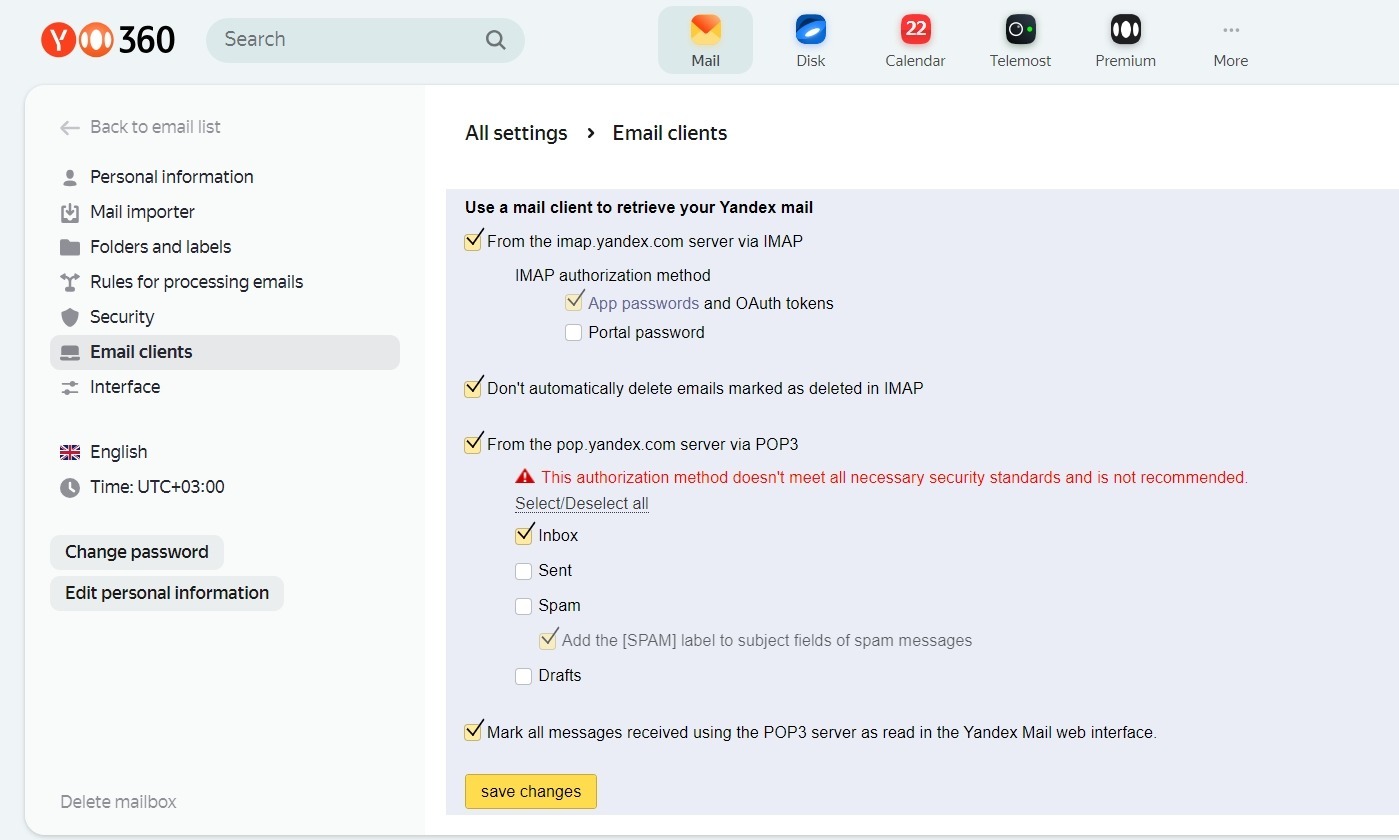
- On the page that opens, click on the "Email clients" heading.
- On the page that opens, make a markup as shown in the screenshot below:
- Revisit the "All settings" page and click on "Security".
- On the page that opens, click on the "app passwords" link.
- On the page that opens, click on the "Email address" section, create an application password and write it down.
After the above processes, you can define the relevant fields in the WISECP "Mail Importing Setting" as follows:
- Protocol : POP3
- Mail Server Address / Port : pop.yandex.com PORT : 995
- Username (E-Mail) : Your Yandex Mail address
- Password : The password you noted
- Connect via SSL : Enabled
After defining the above information, click on the "Test connection" button and if successful, click on the "Save" button to save the configuration.
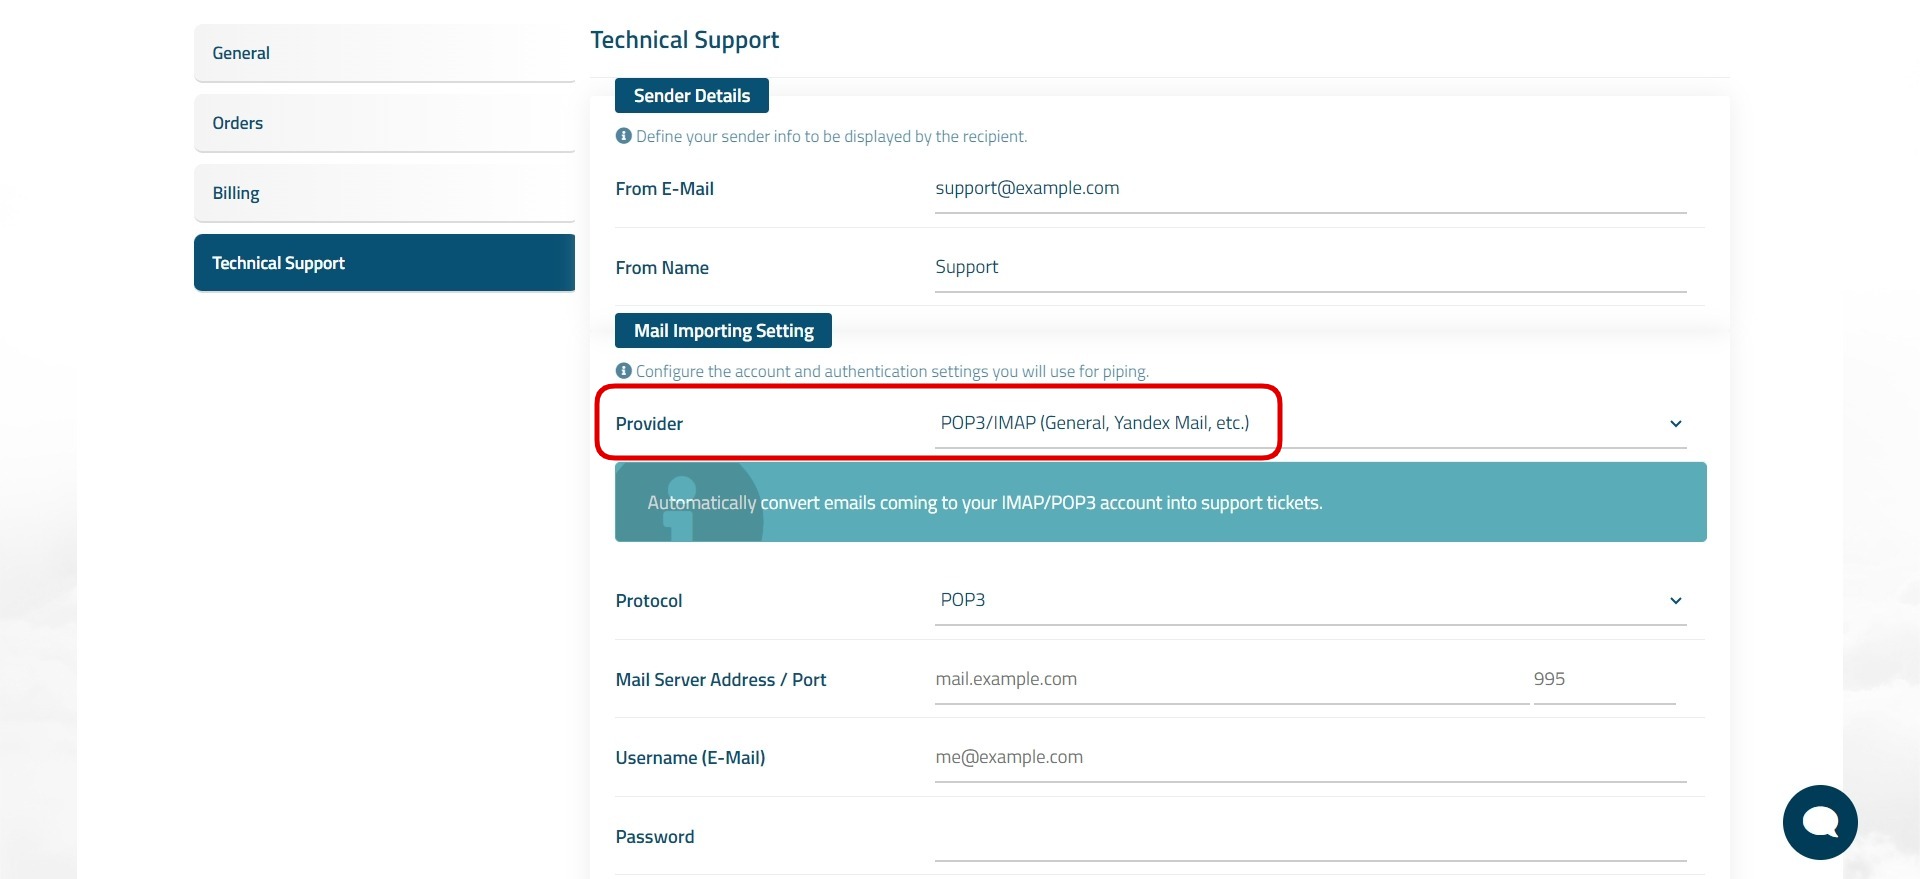
POP3/IMAP
You can choose this option if you manage your incoming mails through a local or dedicated server. The process you need to follow is as follows:
- Protocol : POP3 or IMAP
- Mail Server Address : pop.example.com or imap.example.com
- PORT (if POP3) : 995 (if IMAP) : 993
- Username (E-Mail) : Your Mail address
- Password : Password for your email address
- Connect via SSL : Enabled
After defining the above information, click on the "Test connection" button and if successful, click on the "Save" button to save the configuration.

 Welcome to the Usage Guide