") Worldwide (English)
Worldwide (English)") Türkiye (Türkçe)
Türkiye (Türkçe) Welcome to the Usage Guide
Sign up with Facebook
Once you've logged into your Facebook account, log in to https://developers.facebook.com
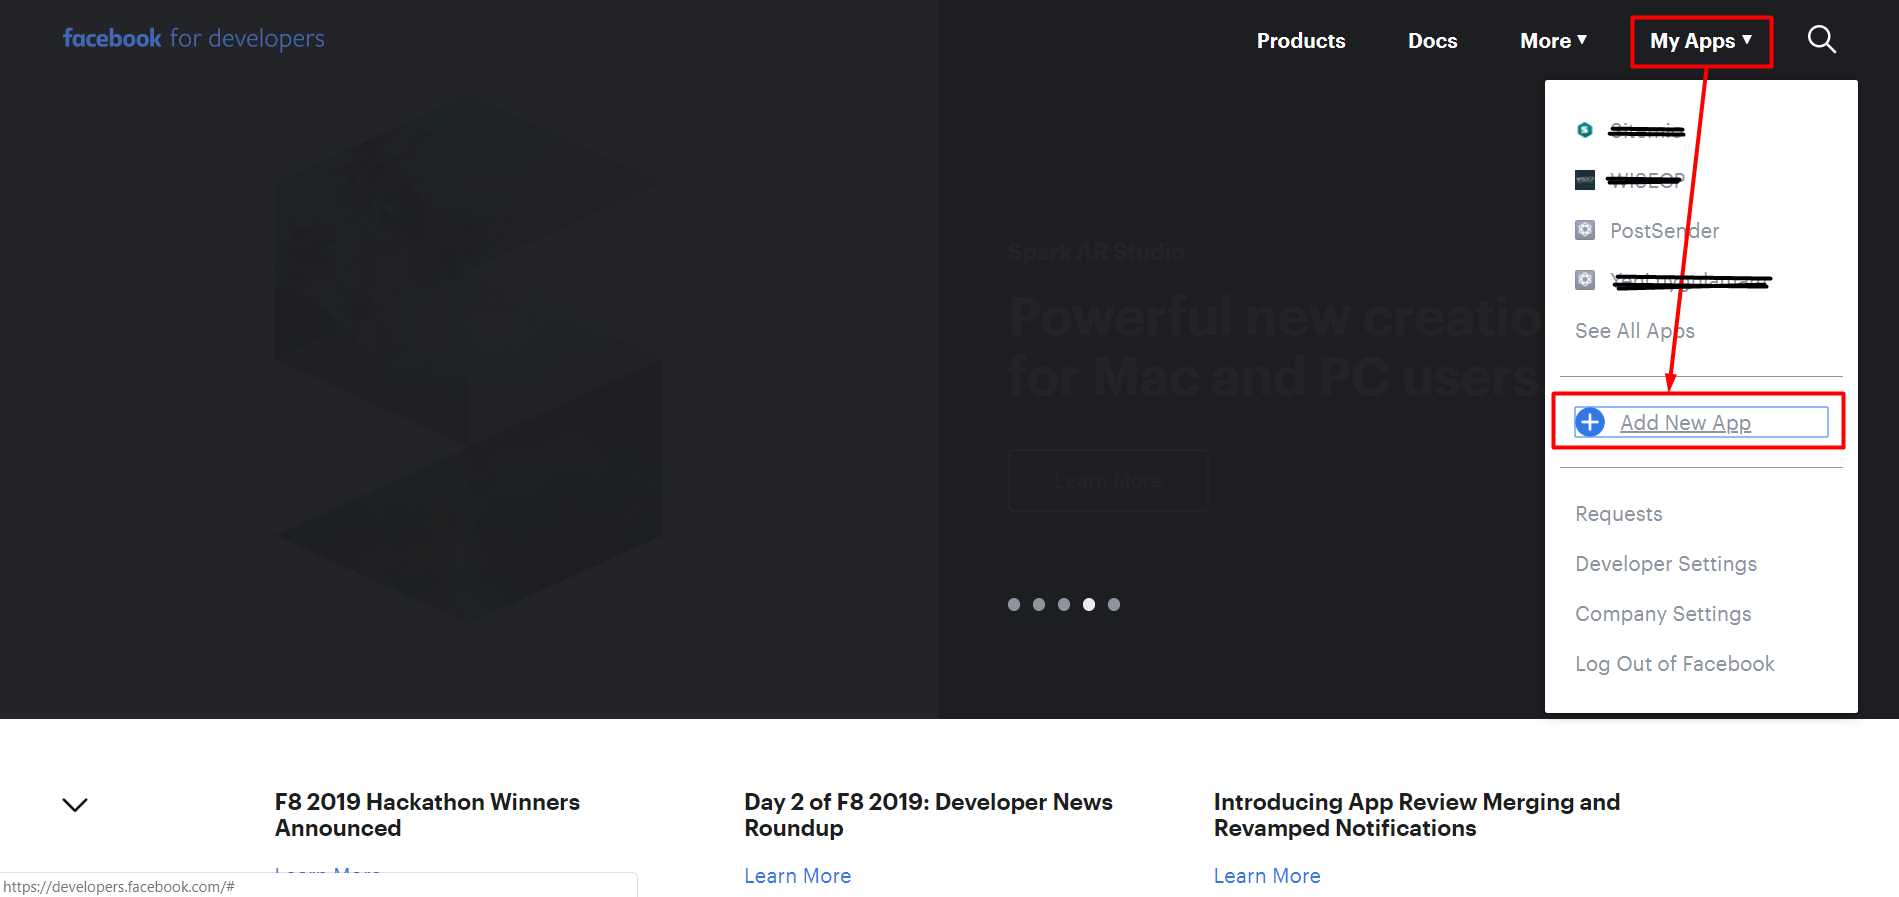
Click to "My Apps > Add New App"

- Display Name: Enter the name of your app. (e.g. Example Login App)
- Contact Email: Enter your email address.
- Click to Create App ID button
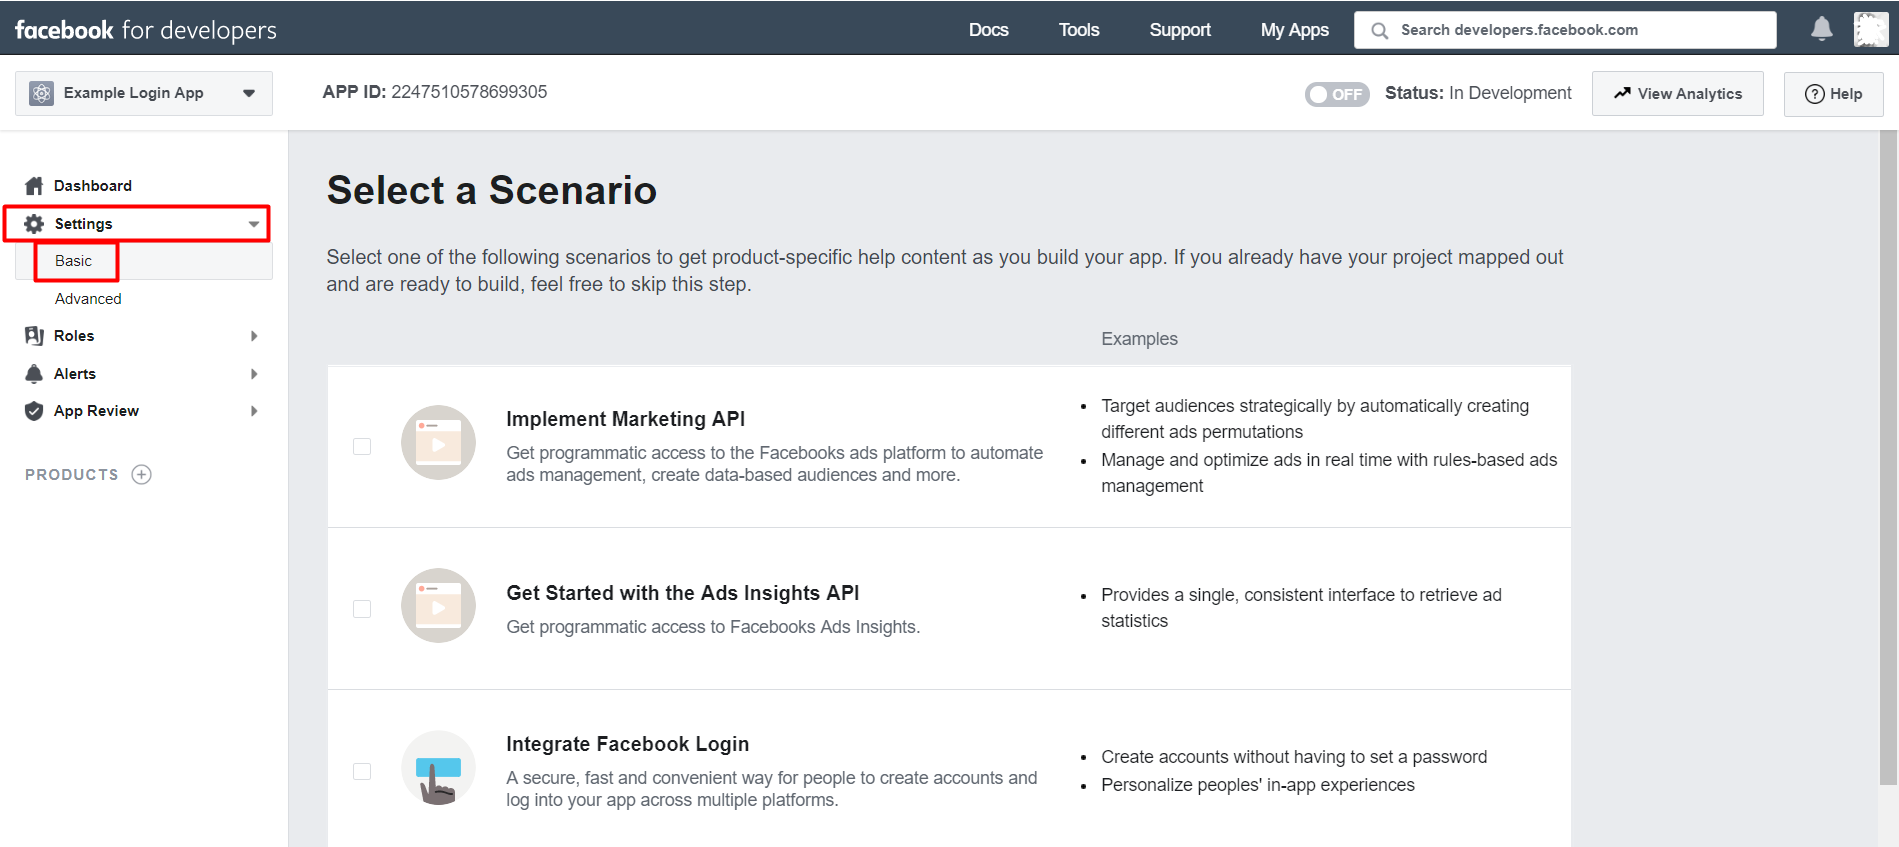
Click on the "Basic" menu under "Settings" from the menu on the left.
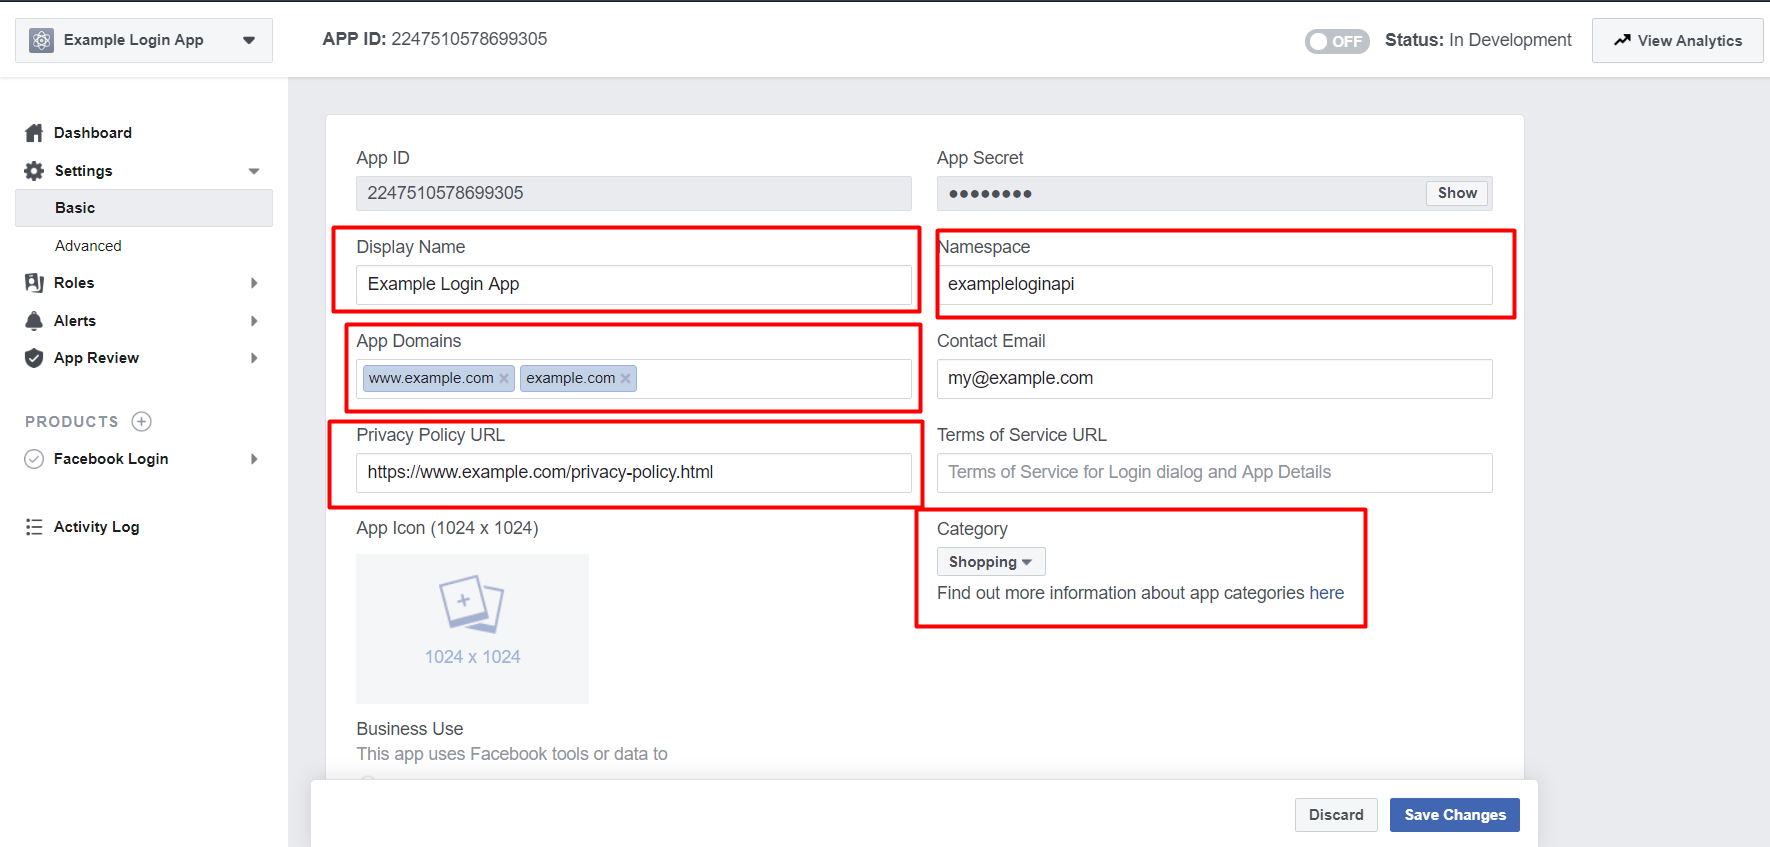
- Take Note "App ID" information. (You will need to define on the plugin.)
- Take Note "App Secret" information. (You will need to define on the plugin.)
- Type the domain name of your site without "www" and "www" in the "App Domains" field.
- Define the URL address of your website's service and usage agreement on the Privacy Policy URL field.
- In the Category field, choose which category you are operating in.
- Click to Save Changes button.
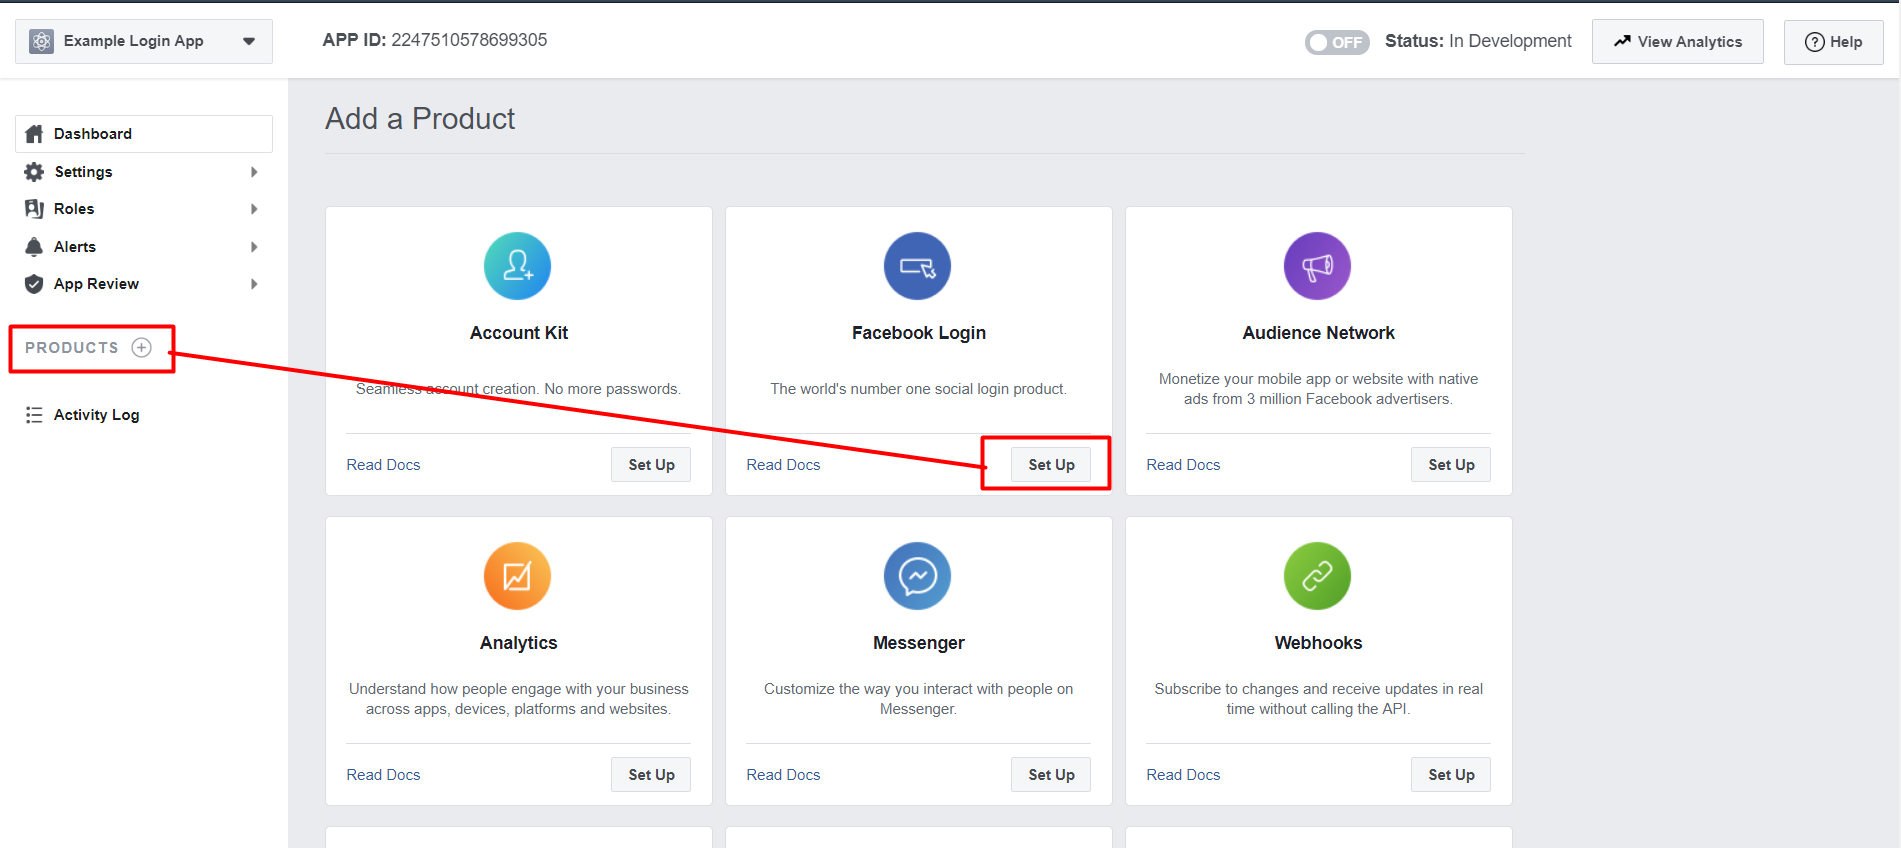
Click on the (+) button next to "PRODUCTS" from the menu on the left. and click on the "Set Up" button under "Facebook Login" from the pop-up page.
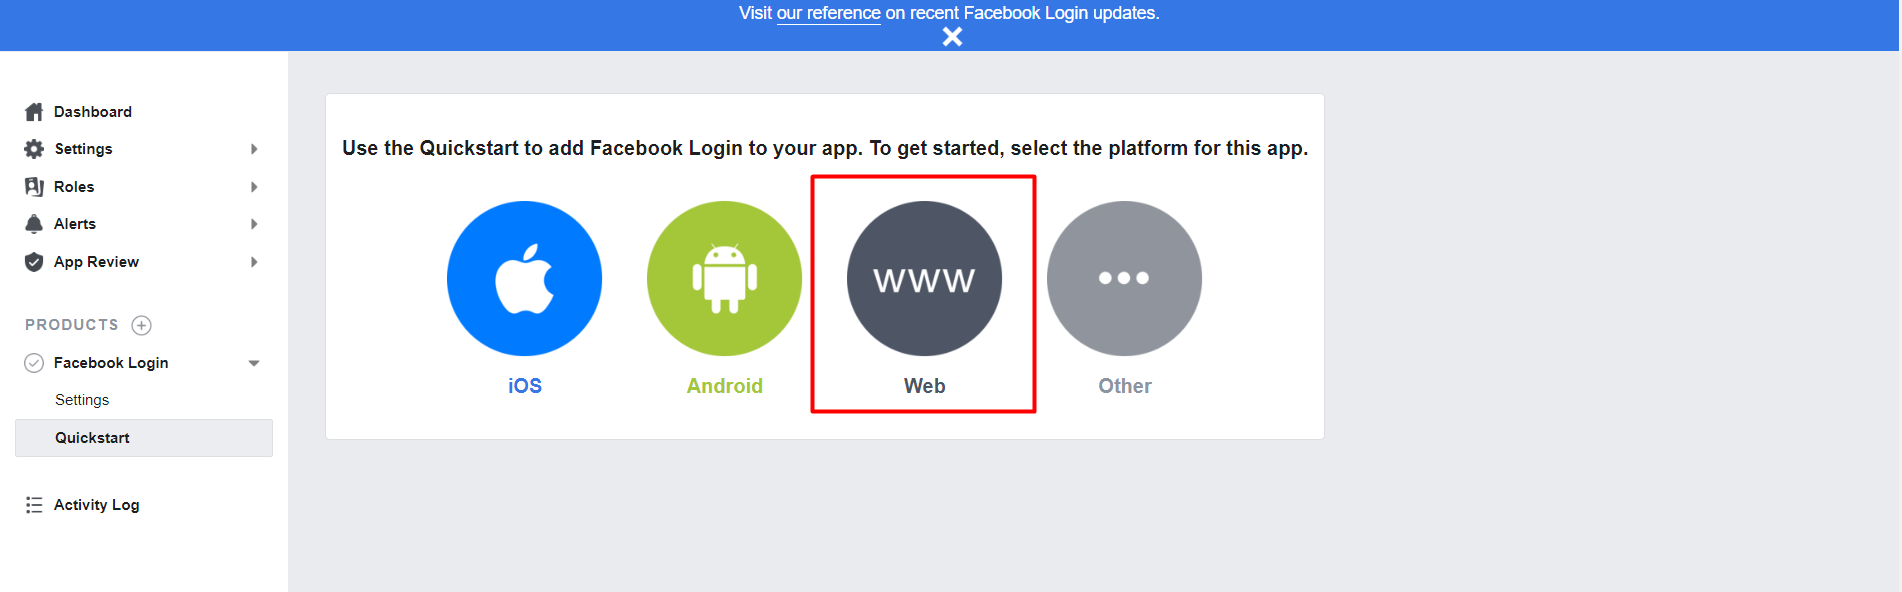
- Select the option that is "Web" and enter your website's URL address in the "Site URL" area under the "Tell Us about Your Website" tab from the incoming screen. (For Ex: https://www.example.com)
- And Click to the Save button.
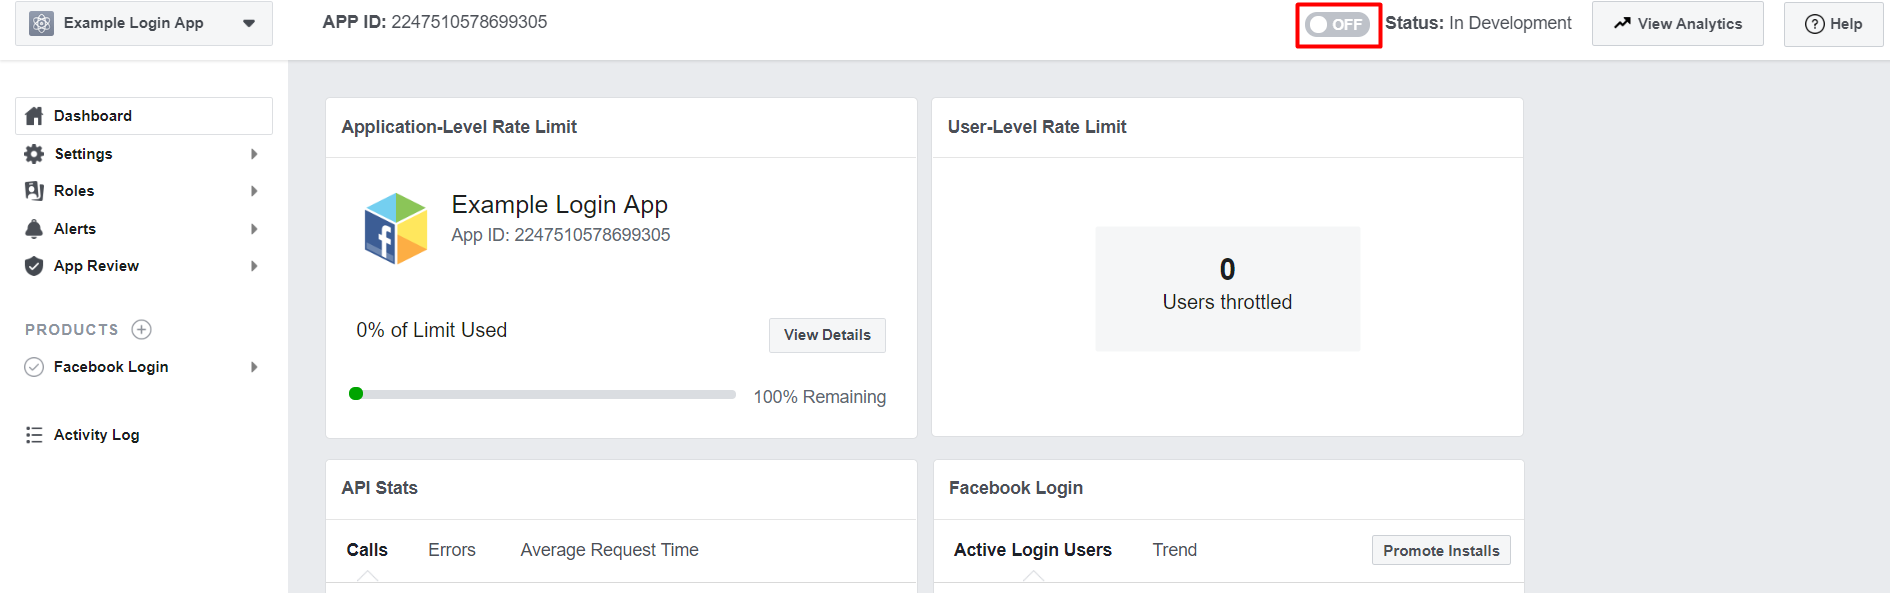
Click in the "OFF" button to the right of the "APP ID" area.
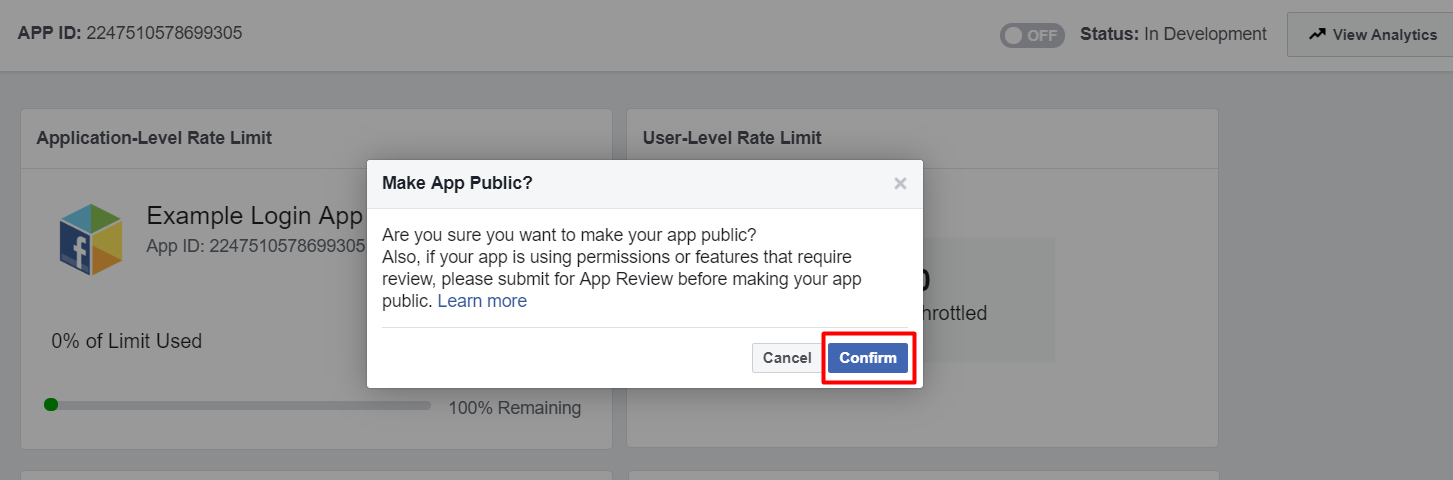
On the incoming screen, press the "Confirm" button and the process will be complete.
In Later,
Identify the information you have taken note to the Wisecp plug-in settings.
