") Worldwide (English)
Worldwide (English)") Türkiye (Türkçe)
Türkiye (Türkçe) Welcome to the Usage Guide
ApisCP
ApisCP is an open-source hosting platform for your PHP, Ruby, Node, Python, and Go projects. With the WISECP+ApisCP module, you can automatically provide hosting sales and management.
ApisCP Module Features
| Features | Client Area | Admin Area |
| Auto / Manual Account Creation |  |
|
| Suspend / Unsuspend | |
|
| Termination | |
|
| Changing Package | |
|
| Upgrade / Downgrade | |
|
| Reinstalling Hosting Account | |
|
| Displaying Resource Usages (With Graphics) | |
|
| Password Update | |
|
| One-click Hosting Panel Login | |
|
ApisCP Module Installation
- ApisCP module comes with v2.3. So make sure your WISECP version is at least 2.3.
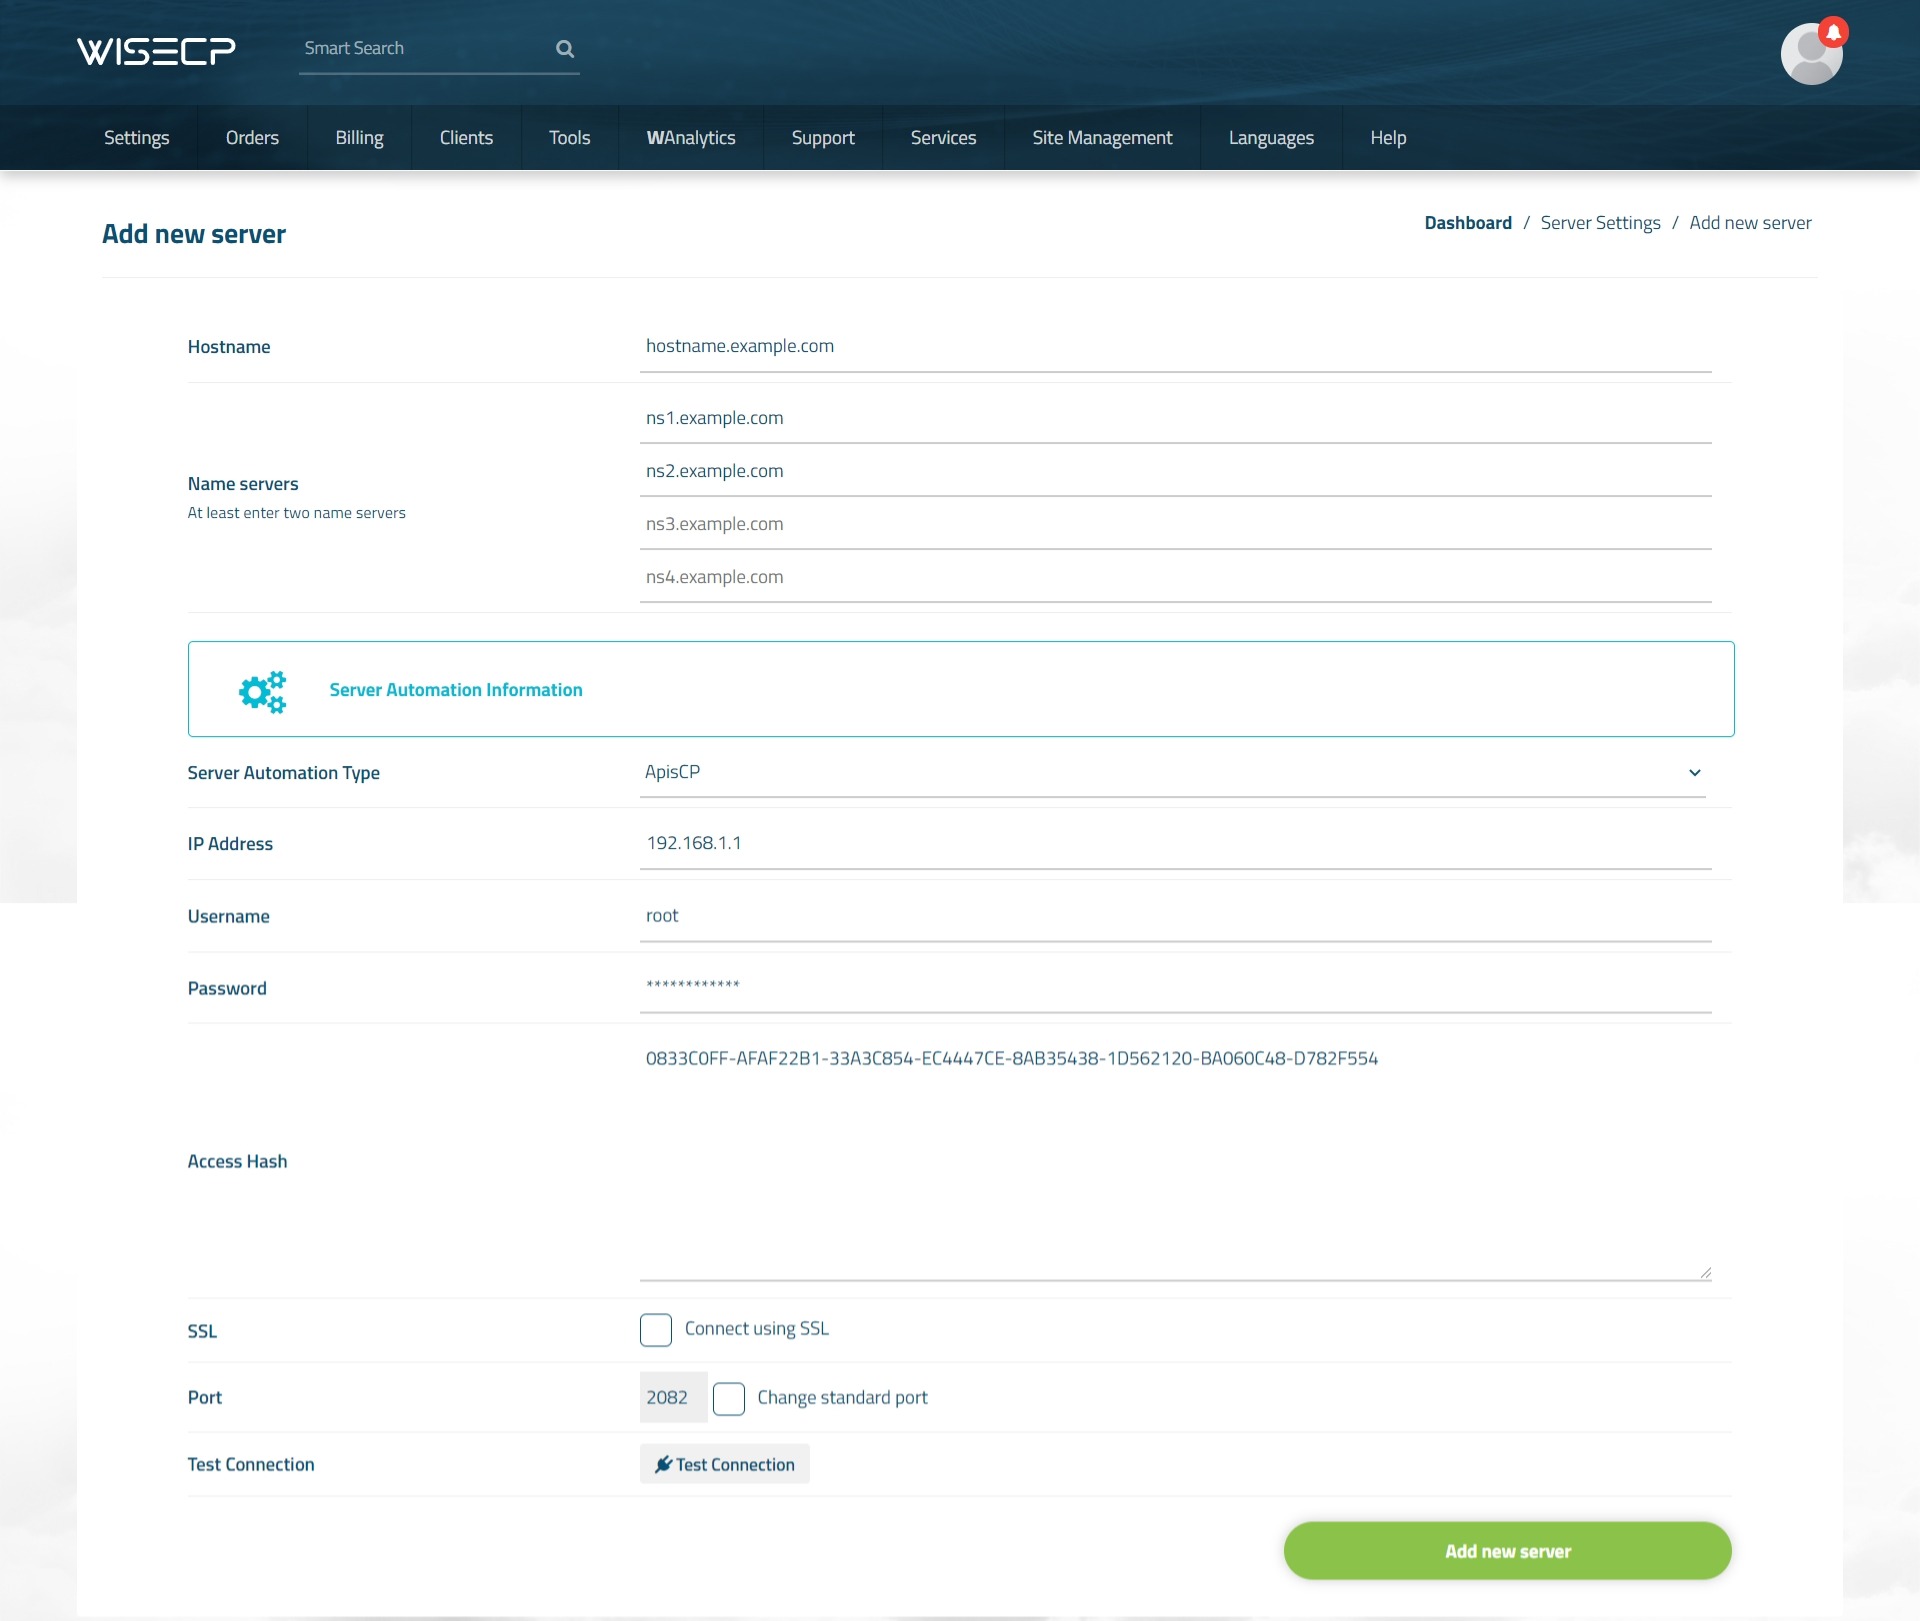
- Follow the path "Admin Area > Services > Hosting Management > Server Settings"
- Click the "Add New Server" button.
- Make definitions as follows on the page that opens.
Hostname : Server IP address or hostname information.
Name servers : It does not need to be defined.
Server Automation Type : Select "ApisCP"
IP Address : Server IP address or Hostname.
Username : ApisCP root username.
Password: "Password" info that you are logged on to your ApisCP panel.
Access Hash : Create an API key on the "Dev > API" page of your ApisCP panel and define it in this field.
SSL : Mark it to establish API connection using SSL.
"Hostname" information must be defined in the "IP Address" field instead of the server IP address.
Test Connection : Check and test the validity of the information defined.
Using ApisCP Module
After the module installation process is complete, you are ready to create product packages. Please follow the steps below.
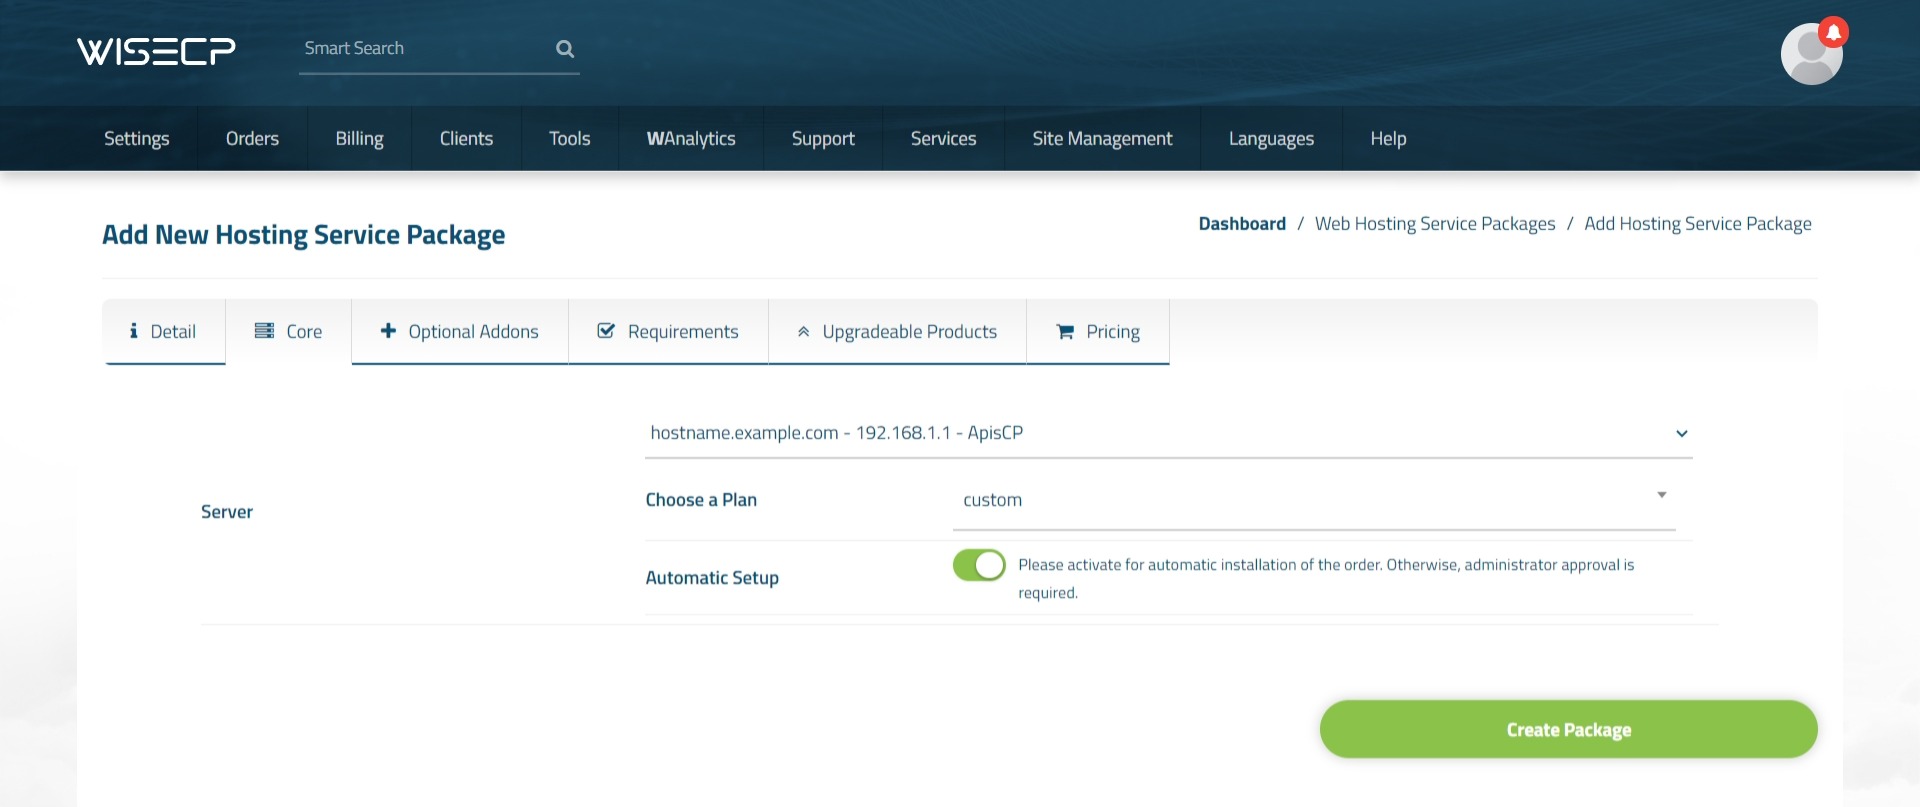
- Follow the path "Admin Area > Services > Hosting Management > Hosting Packages"
- Click the "Create New Package" button.
- Fill in all the necessary information about the product package as you wish and click on the "Core" tab.
- Select your "ApisCP" server that you added before in the "Server" field.
- At the bottom, you can select the hosting packets you created earlier in ApisCP. If you want the hosting account to be installed automatically, enable the "Automatic Setup" feature.
- After providing definitions as you see fit in other tabs, click the "Create Package" button and complete the process.
You are now ready to sell products!
When you receive an order for the package you have created, you can view and manage it in the "Orders" list of your admin area.
