") Worldwide (English)
Worldwide (English)") Türkiye (Türkçe)
Türkiye (Türkçe) Welcome to the Usage Guide
Order Requirement
If there is some information you need to get from your customers during the purchasing process, you can create requirements for it.
Content Map
- How to Create Order Requirements?
- Order Requirement Adjustments
- Connecting with a Service Package
- Connecting the Order Requirement to API
How to Create Order Requirements?
Please follow the steps below to create an order requirement.
- Follow the path "Admin Area > Services > Service Management > Order Requirements"
- On the page that opens, click the "Add new requirement" button.

- On the page that opens, you can provide the necessary definitions according to the information explained in detail below.
Order Requirement Adjustments
There are some settings to create an order requirement.
- Name
Make a naming for required information (your customers will see this). For example: Color Options - Description
Write a description for required information. (Your customers will see this). For example: What color do you prefer? - Group
You can assign the required information to a group. This allows you to collect some requirements information under one group and find it easily. - Related Service Group
Select which product group the requirement information will be linked to. This will show up on the product pack in the "Requirements" tab on the product line. - Mandatory
When you activate this tile, your customer cannot move forward without identifying the requirement information. - Option Type
You can determine the style view of the requirement information that will appear during the order ingress.
Connecting with a Service Package
You have created an order requirement and want to link it to a service package, follow the steps below.
- Click on the product group you want to process on the "Admin Area > Services" path.
- Go to the stage of editing a product package you want.
- Click on the "Requirements" tab on the page that opens.
- Tick the order requirement you created earlier and save your settings.
(If you cannot see the requirement you previously created in the product package details, the requirement you have created may not belong to this product group. Pay attention to which product group the requirements you have created belong to.)
Connecting the Order Requirement to API
In some cases, the order requirement may need to be sent to an API service linked to the service. In this way, you can enable your customer to define a mandatory information for automatic setup and send it to the API.
To send the order requirement information to an API, follow the steps below.
- Start the process of creating an order requirement as described above or move on to editing an existing order requirement.
- Select a service in the "Related Product Group" field.
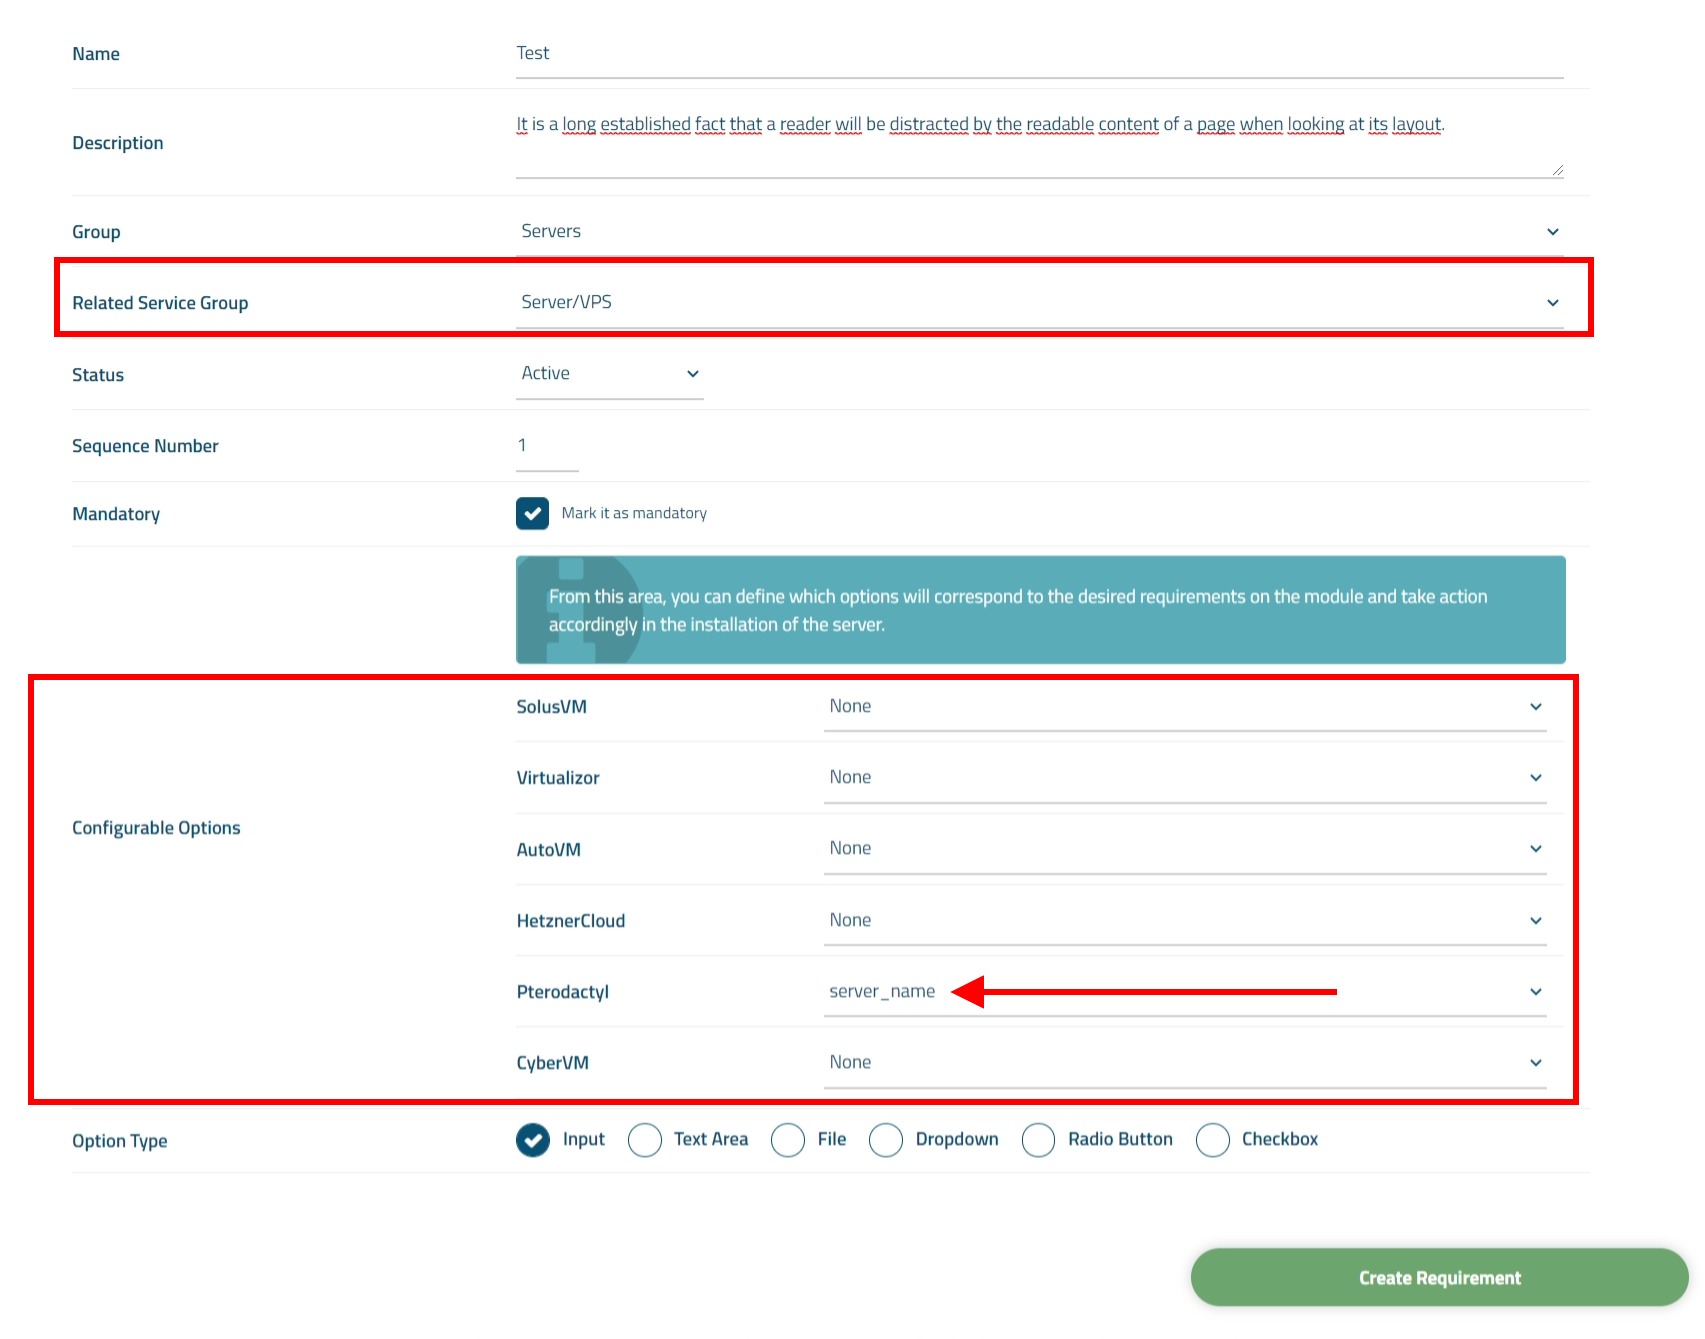
- Available API modules will be listed in the "Configurable Options" area. Here you can choose which API parameter the order requirement information will be linked to.
(For example: If you want your customer to determine what the server name should be, you can select the "server_name" parameter in the relevant field.) - In the "Option Type" field, specify the format in which your customer will define the data. For example: if long text needs to be defined you can select "textarea". You can choose "input" for standard and short text.
Creating Custom Parameters
If you do not find a parameter you want in the "Configurable Options" field, follow the steps below to create a custom parameter.
-
Open the "coremio/modules/Servers/[MODULE]/config.php" file.
- You can add an example as 'your_parameter_name', under the 'configurable-option-params' line. You can name the parameter name as you see fit. The system automatically detects the parameter you add and provides a post operation to the API.
<?php return [ 'type' => "virtualization", 'access-hash' => false, 'server-info-checker' => true, 'server-info-port' => false, 'server-info-not-secure-port' => 80, 'server-info-secure-port' => 80, 'configurable-option-params' => [ 'your_parameter_name', // <<<<< For Example 'server_name', 'memory', 'swap', 'io', 'cpu', 'disk', 'nest_id', 'egg_id', 'pack_id', 'location_id', 'dedicated_ip', 'port_range', 'image', 'startup', 'databases', 'allocations', 'backups', 'oom_disabled', 'username', ], ]; - Save and close the file.
You can now view and select the parameter you added in the "Configurable Options" area.
