") Worldwide (English)
Worldwide (English)") Türkiye (Türkçe)
Türkiye (Türkçe) Welcome to the Usage Guide
Stripe
You can receive payments via Stripe on WISECP. Please follow the steps below for Stripe configuration.
Stripe.com Required Settings
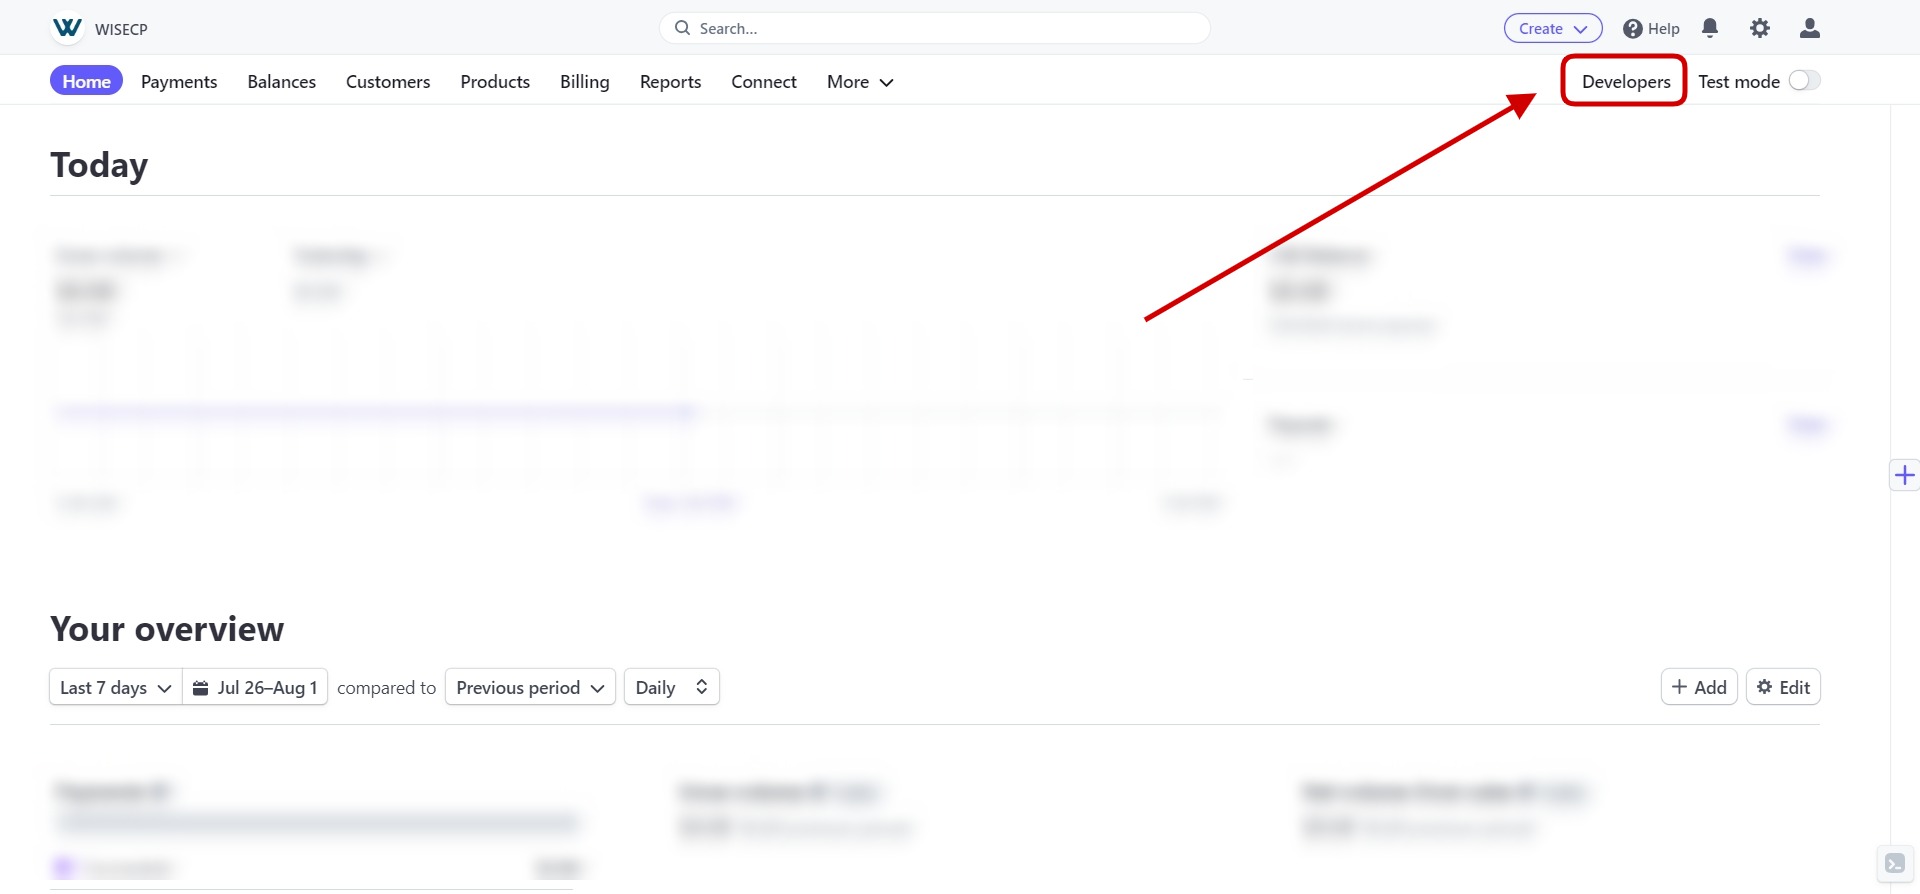
- Login to your Stripe.com area.
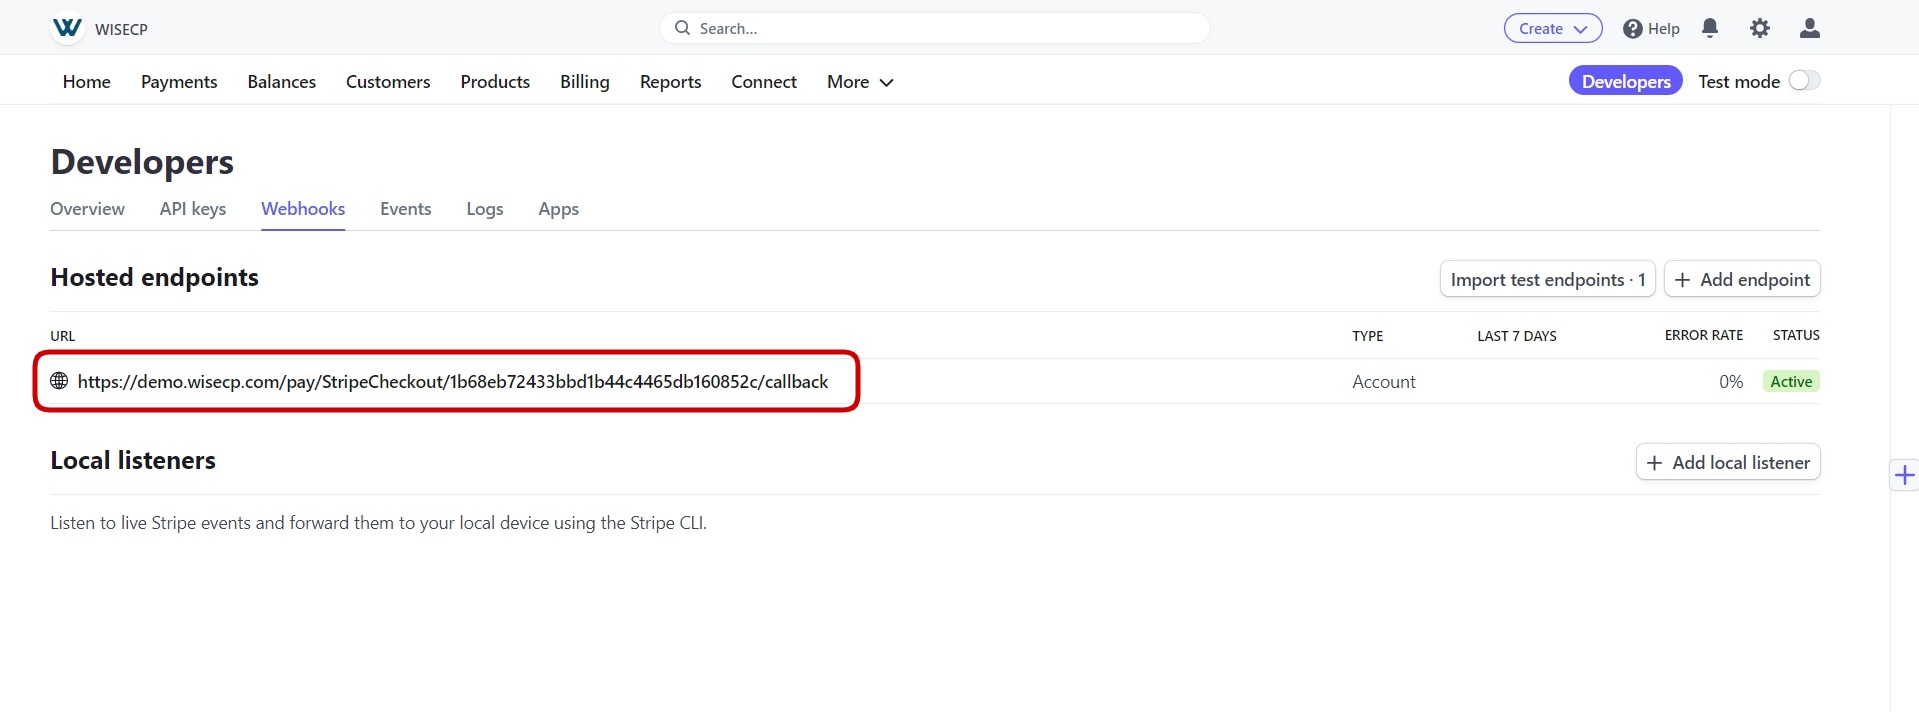
- Click the "Developers" button in the upper right corner.
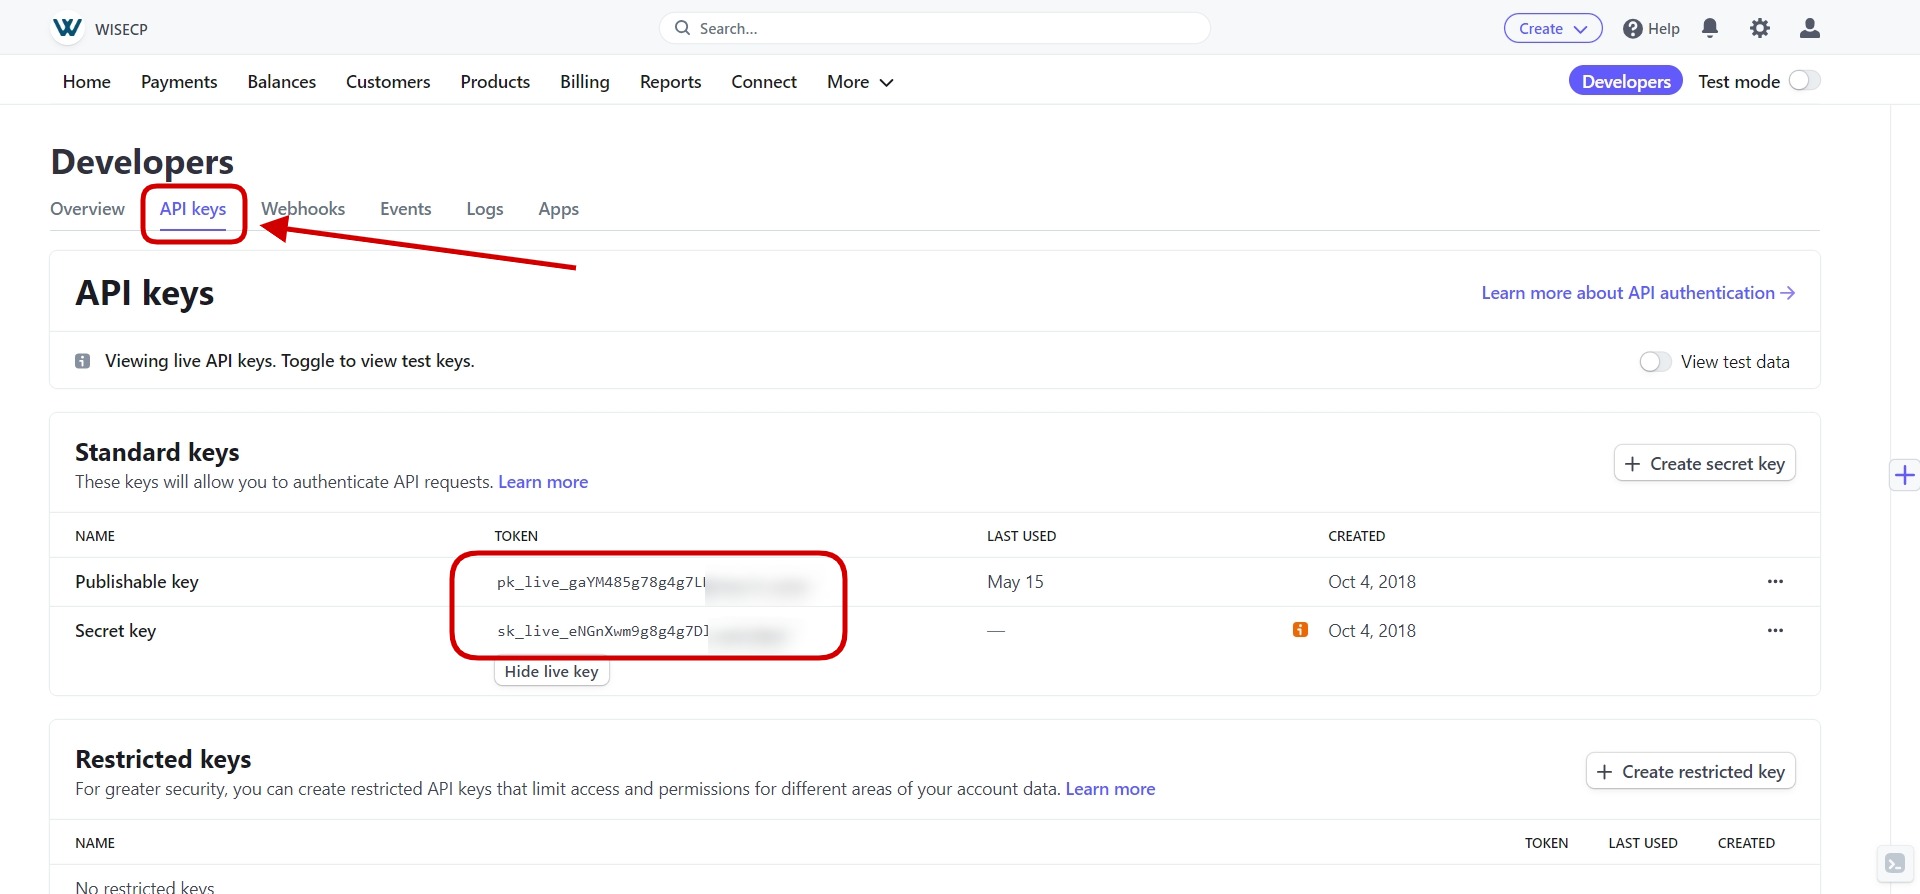
- On the page that opens, click the "API Keys" tab and note the "Publishable key" and "Secret key" information at the bottom.
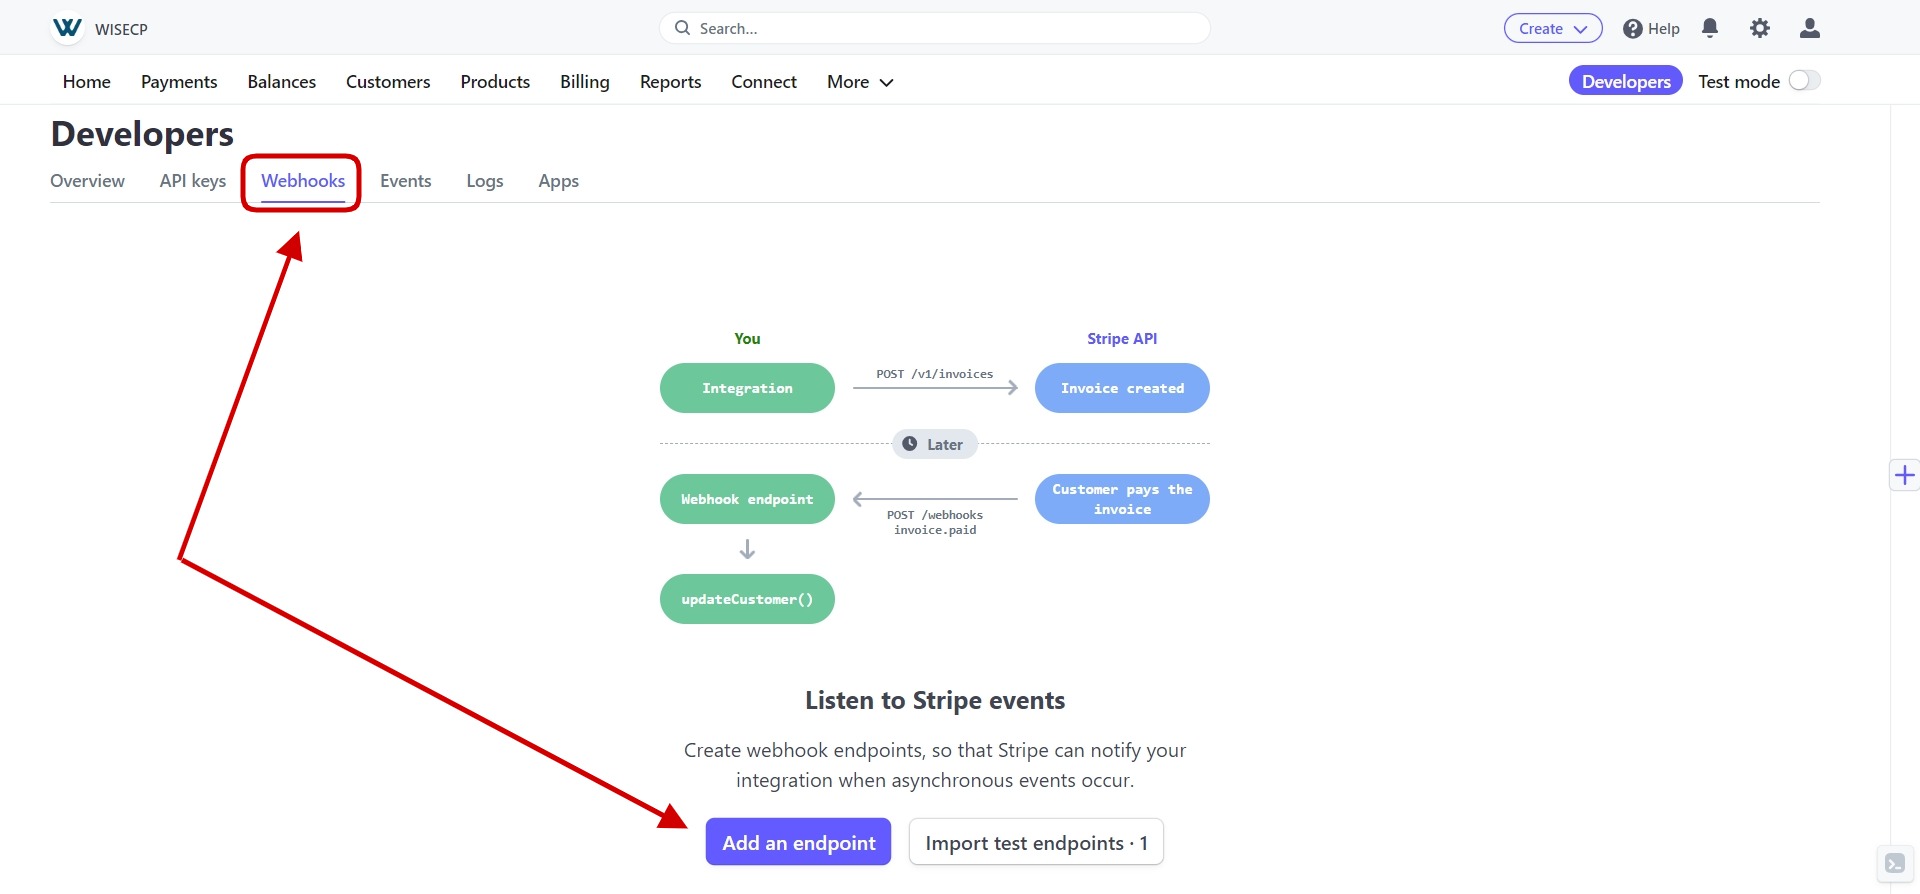
- Click the "Webhooks" tab and then click the "Add an endpoint" button at the bottom of the page.
- In the window that opens, provide the following definitions.
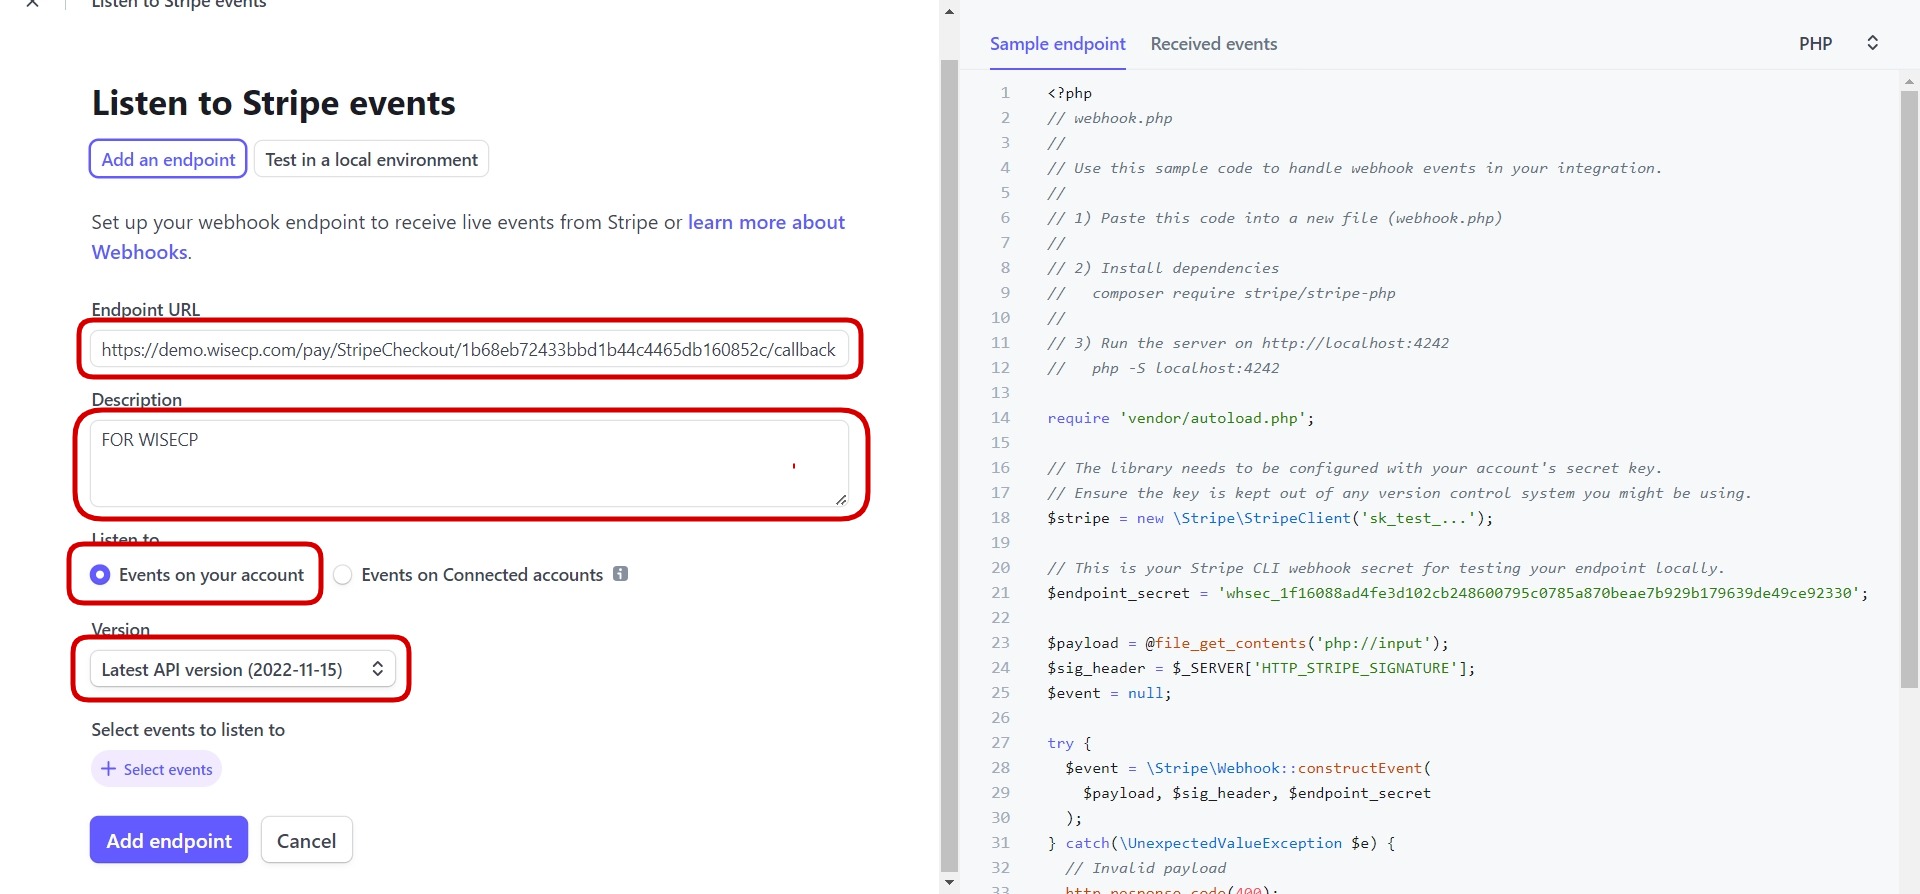
"Endpoint URL" > In this field, define the "Callback URL" information found in the "WISECP Stripe module".
"Description" > Type "FOR WISECP" in this field.
"Version" > Select "Last Version" in this field.
"Select events to listen to" > In this field, if you are going to use "Stripe Basic" type, select the "payment_intent.succeeded" event.
If you are going to use "Stripe Checkout" type, select "checkout.session.completed".
If you are going to use "Stripe Tokenized" you do not need to make any selection.
Important Warning: If the "Select events to listen to" field is not defined correctly as described above, payment information will not be sent to the WISECP system and services and invoices cannot be created on WISECP even if payment has been received on Stripe.
"Add Endpoint" > Click the button to complete the process. - After successfully completing the process, click on the Webhook you have created.
- Make a note of the "Signing secret" (formerly "Webhook Endpoint Secret") information on the page that opens.
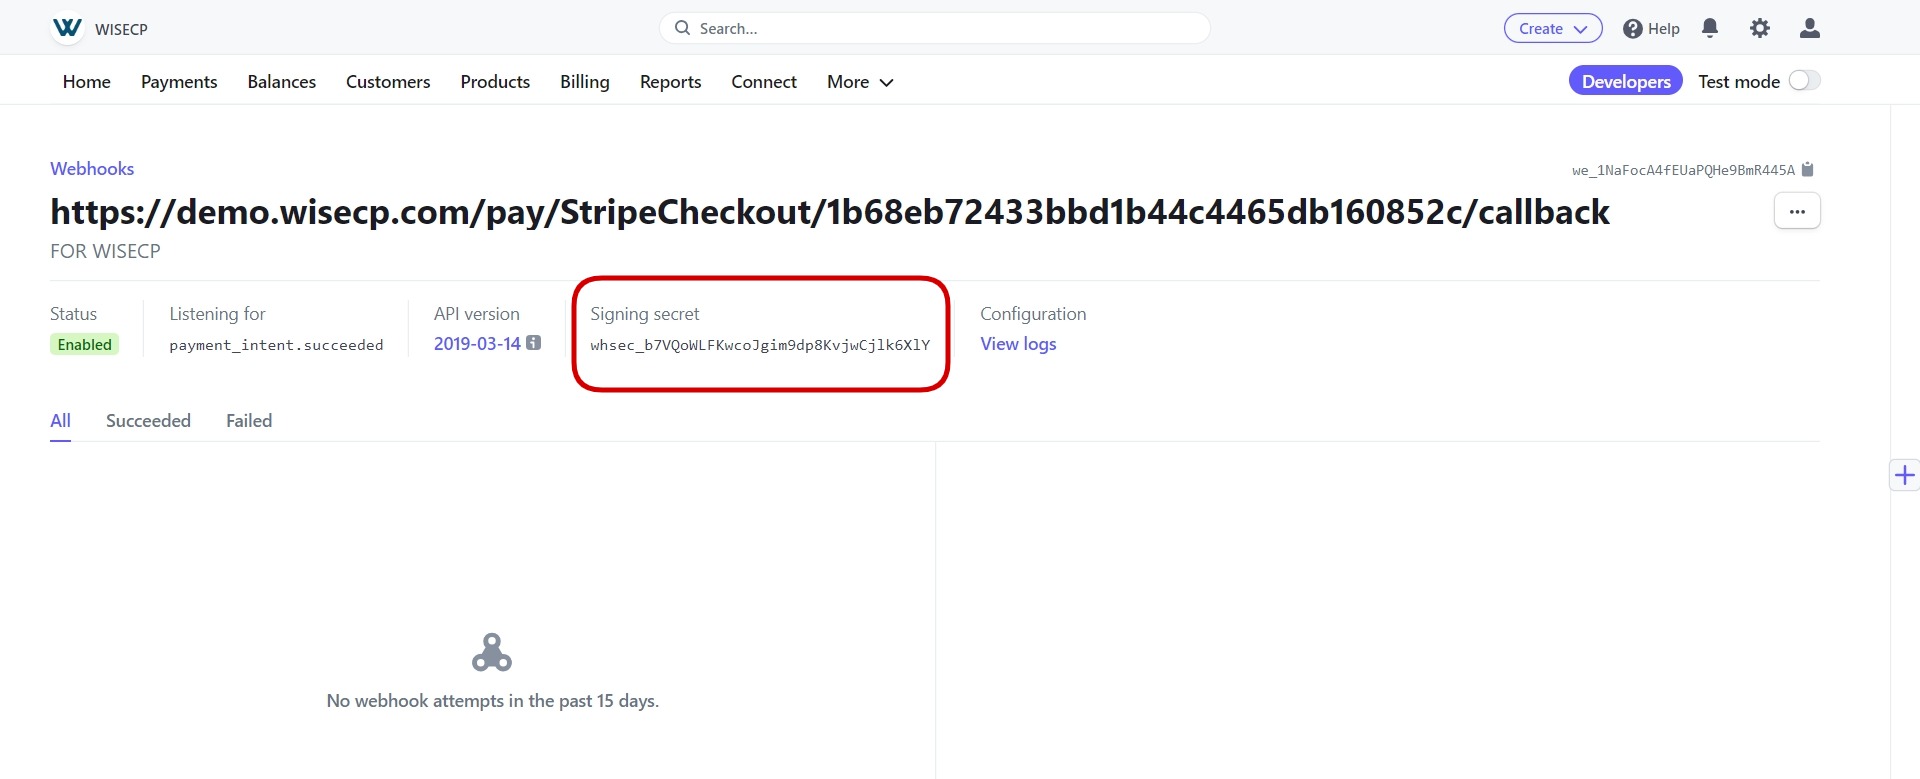
Important Reminder: If "Test Mode" is active in your Stripe panel, it should also be active in the WISECP module. So the same mod must be active on both platforms.
WISECP Module Required Settings
- Follow the path "Admin Area > Settings > Billing > Payment Gateways", and click the "All Modules" tab on the page that opens, and view the Stripe module.
- In the page that opens, define the information you noted earlier, as shown in the screenshot below.
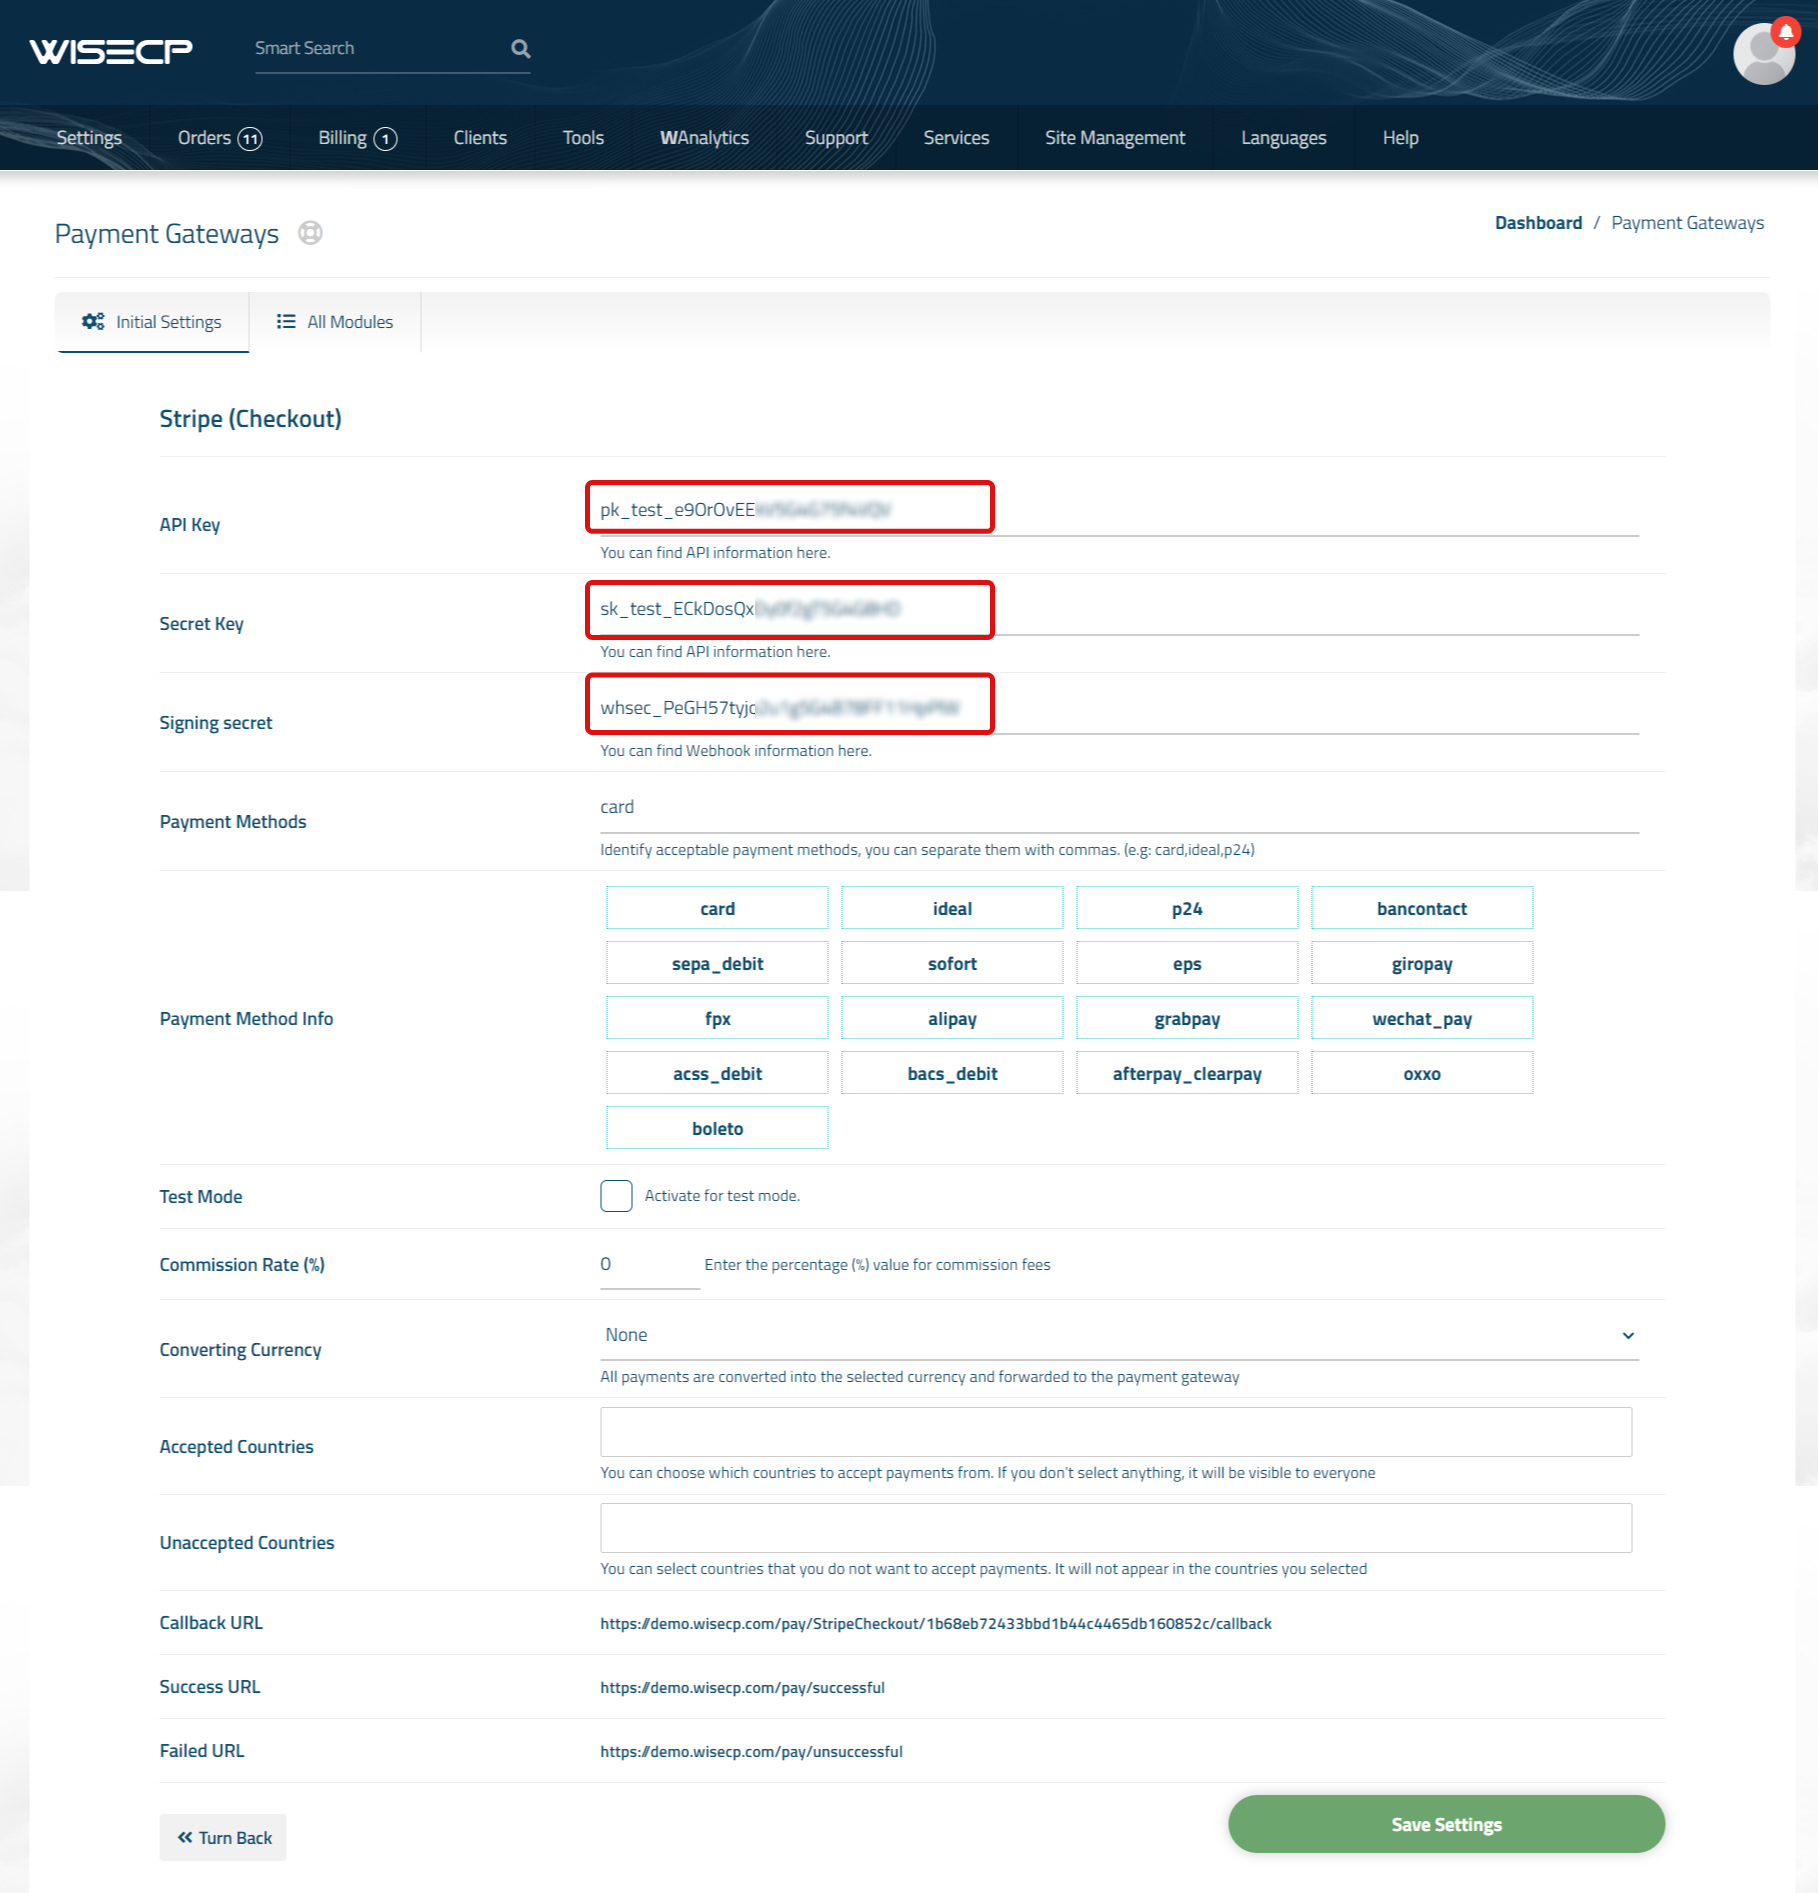
- Follow the path "Admin Area > Settings > Billing > Payment Gateways" and select the "Stripe" module in the "Enabled Module Selection" field on the page that opens and save it.
After all these settings, you can now start receiving payments with Stripe.
