") Worldwide (English)
Worldwide (English)") Türkiye (Türkçe)
Türkiye (Türkçe) Welcome to the Usage Guide
Pterodactyl
With the advanced WISECP module, you can automatically provide server sales and management and give your customers a high-level experience above the standards.
Pterodactyl Module Features
| Features | Client Area | Admin Area |
| Auto / Manual Server Creation |  |
|
| Suspend / Unsuspend | |
|
| Termination | |
|
| Updating Resource Usage Limits | |
|
| Import from Pterodactyl | |
|
| Upgrade / Downgrade | |
|
| Restart / Start / Stop / Reinstall / Kill | |
|
| Displaying Resource Usages (With Graphics) | |
|
| Displaying Server Status (Online / Offline) | |
|
| Password Update | |
|
| Panel Login Button | |
|
Important Reminder
In order to use the Pterodactyl module with all its features, the "reCAPTCHA" feature of your Pterodactyl panel in "Settings > Advanced > reCAPTCHA" must be inactive. Otherwise only "basic functions" will be available.
Pterodactyl Module Installation
- Pterodactyl module comes with v2.3. So make sure your WISECP version is at least 2.3.
- Follow the path "Admin Area > Services > Hosting Management > Server Settings"
- Click the "Add New Server" button.
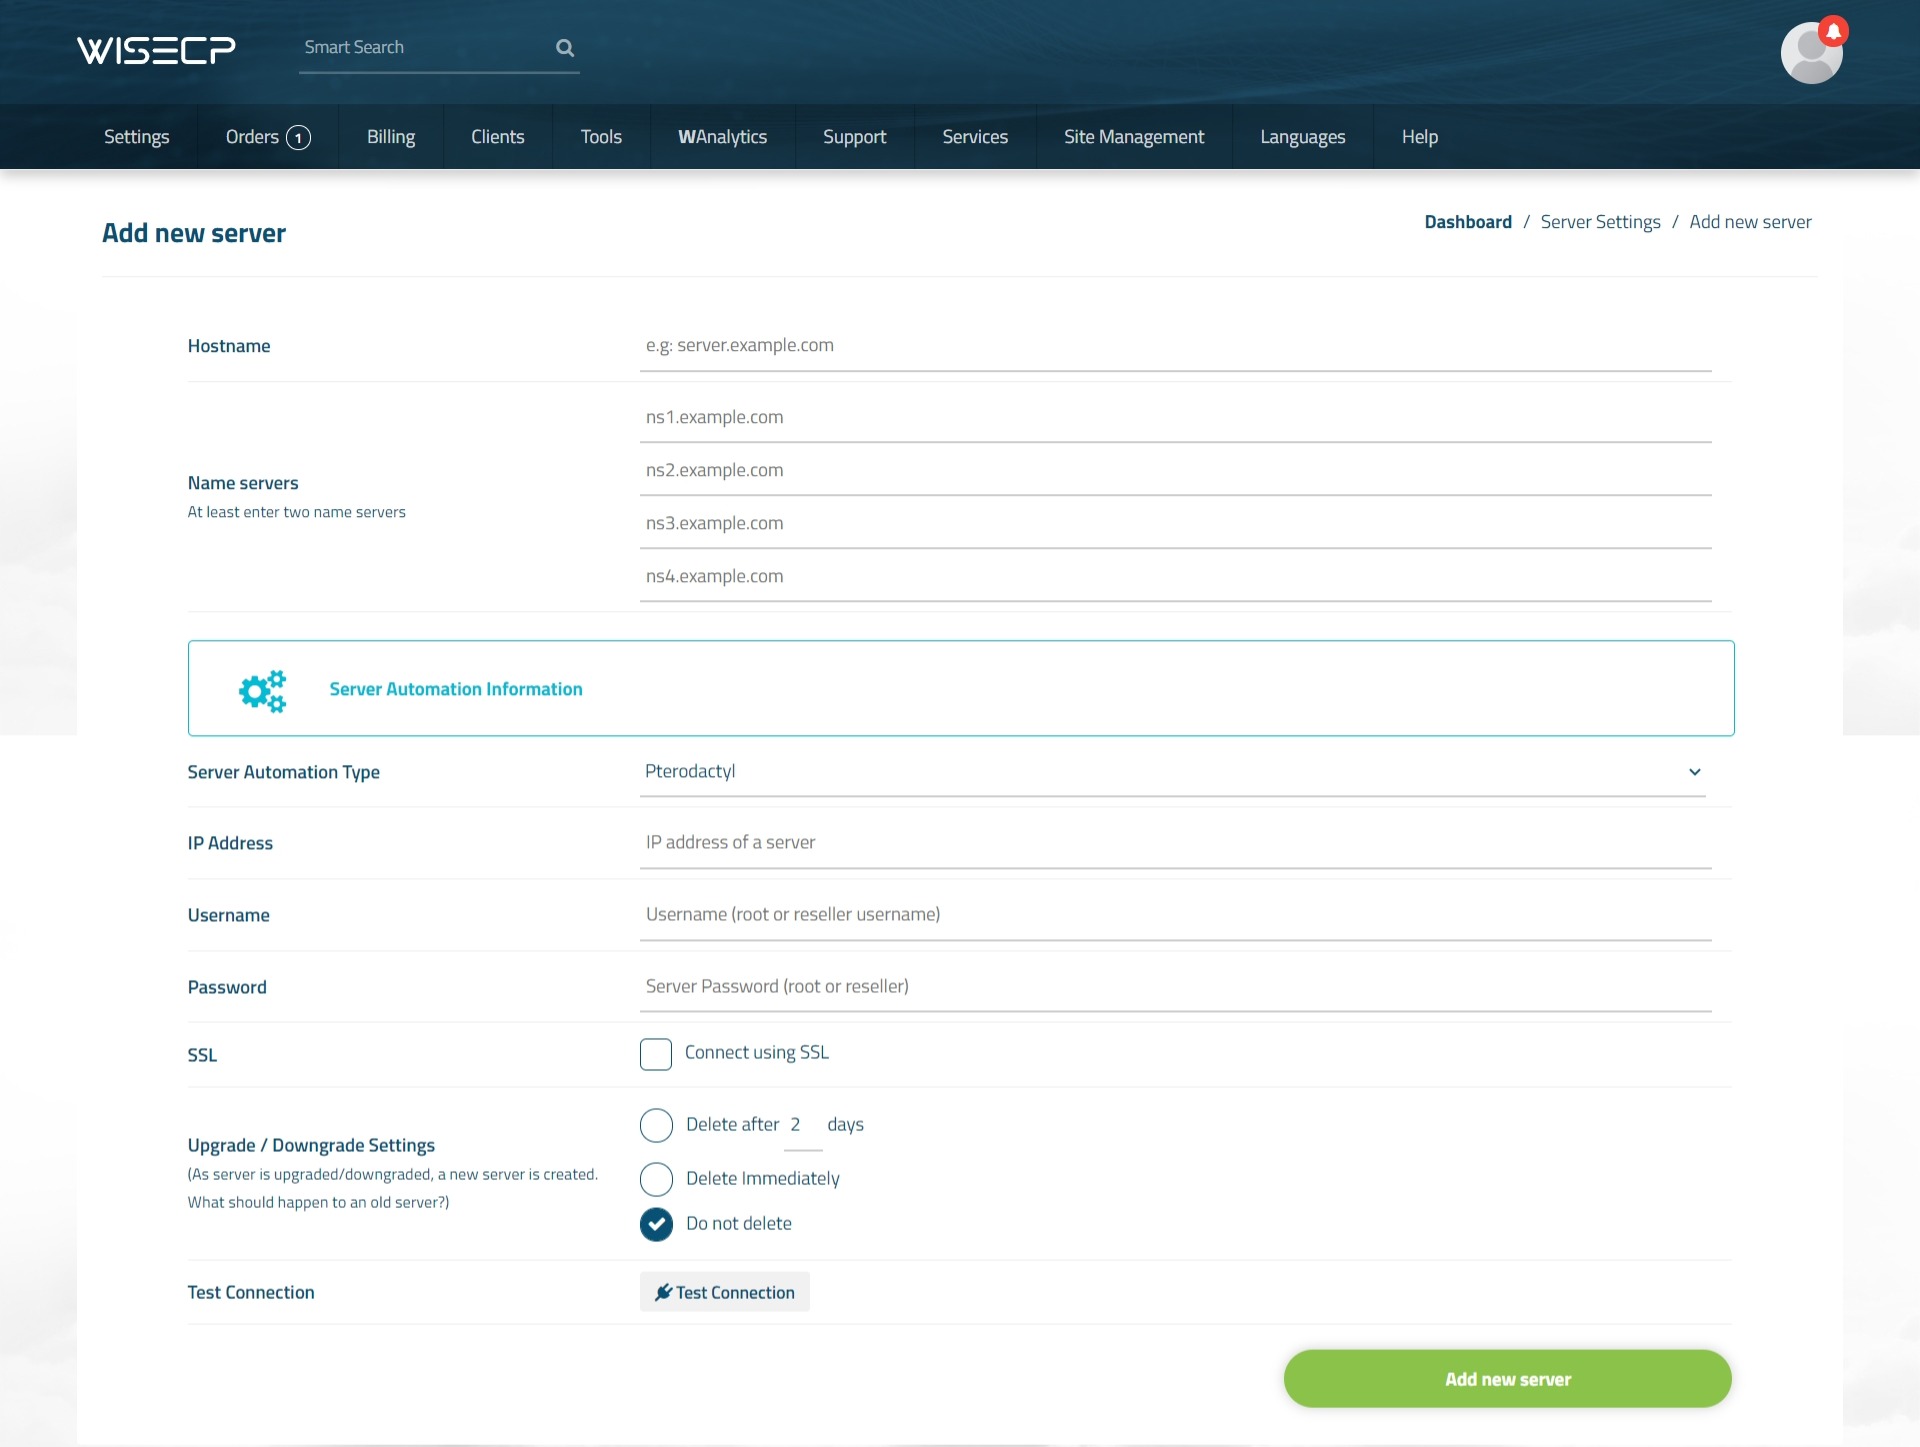
- Make definitions as follows on the page that opens.
Hostname : Server IP address or hostname information.
Name servers : It does not need to be defined.
Server Automation Type : Select "Pterodactyl"
IP Address : Server IP address or Hostname.
Username : The "username" or "e-mail" address used to login to your Pterodactyl panel.
Password : "KEY" information in the "Application API" section of your Pterodactyl panel.
(While generating KEY information, you should make sure that all privileges are given. http://prntscr.com/y4wjk3 )
SSL : Mark it to establish API connection using SSL.
"Hostname" information must be defined in the "IP Address" field instead of the server IP address.
Upgrade / Downgrade Settings : Mark it as "Do not delete".
Test Connection : Check and test the validity of the information defined.
Using Pterodactyl Module
After the module installation process is complete, you are ready to create product packages. Please follow the steps below.
- Follow the path "Admin Area > Services > Hosting Management > Dedicated/VPS Packages"
- Click the "Create New Package" button.
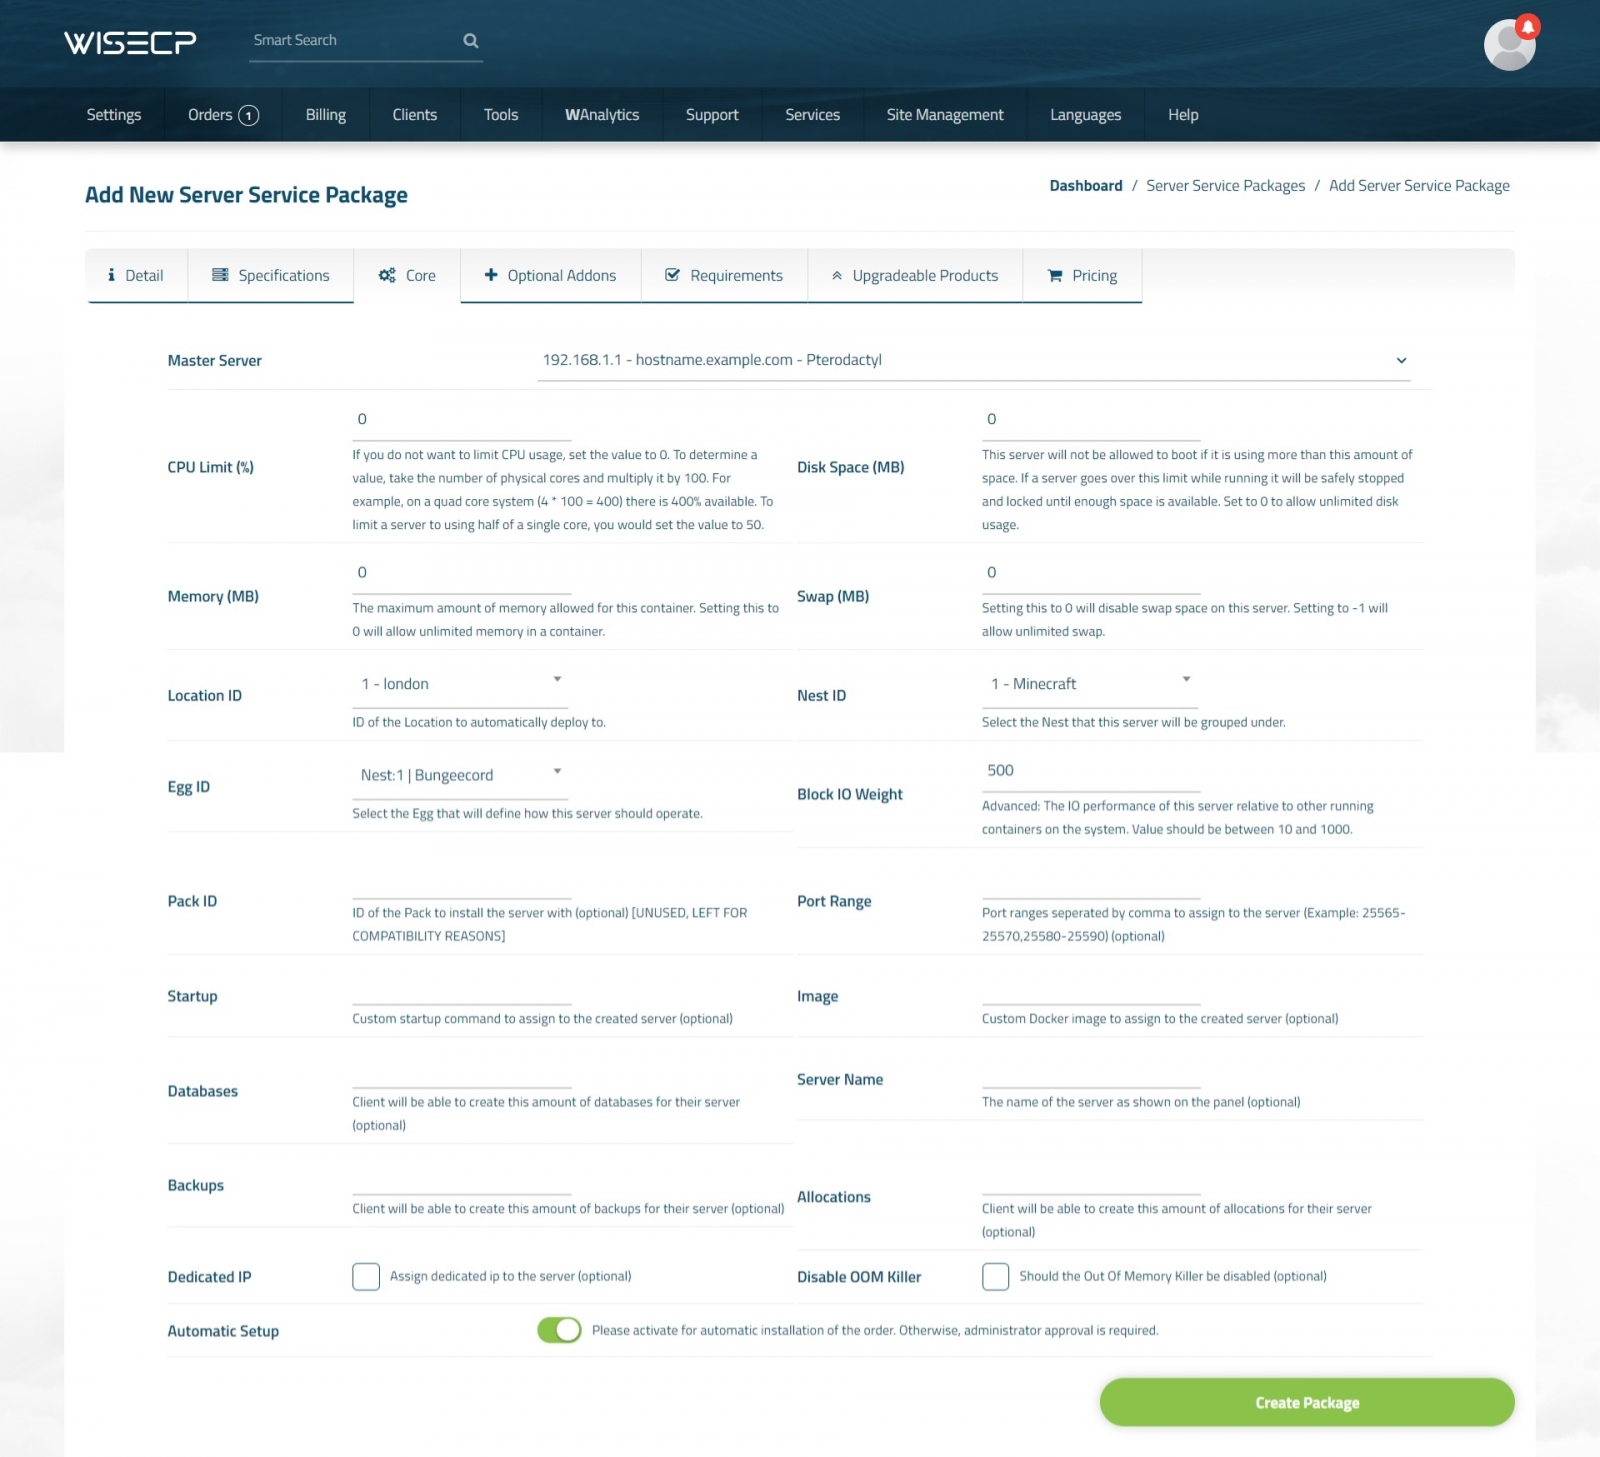
- Fill in all the necessary information about the product package as you wish and click on the "Core" tab.
- Select your "Pterodactyl" server that you added before in the "Master Server" field.
- In the fields opened at the bottom, define the data about your package according to your wishes. If you want the server to be installed automatically, enable the "Automatic Setup" feature at the bottom of the page.
- After providing definitions as you see fit in other tabs, click the "Create Package" button and complete the process.
You are now ready to sell products!
When you receive an order for the package you have created, you can view and manage it in the "Orders" list of your admin area.
Important Reminder If you encounter any errors during Pterodactyl panel usage and receive an alert to enable module error logs, you can enable and review module error logs through the "Admin Area > Tools > Process Logs > Module Activity Log" path.
Importing from Pterodactyl
WISECP has a unique integration for Pterodactyl panel. In this way, you can easily transfer the existing servers in your Pterodactyl panel to your customers in your WISECP automation system. For this, follow the steps below.
- Follow the path "Admin Area > Services > Hosting Management > Server Settings"
- Click on the Pterodactyl server you created earlier in the list.
- On the page that opens, click the "Import" tab. Then click the "List Results" button.
After these processes, the available servers in your Pterodactyl panel will be listed. You can define the servers you want to the customers you want through the list.
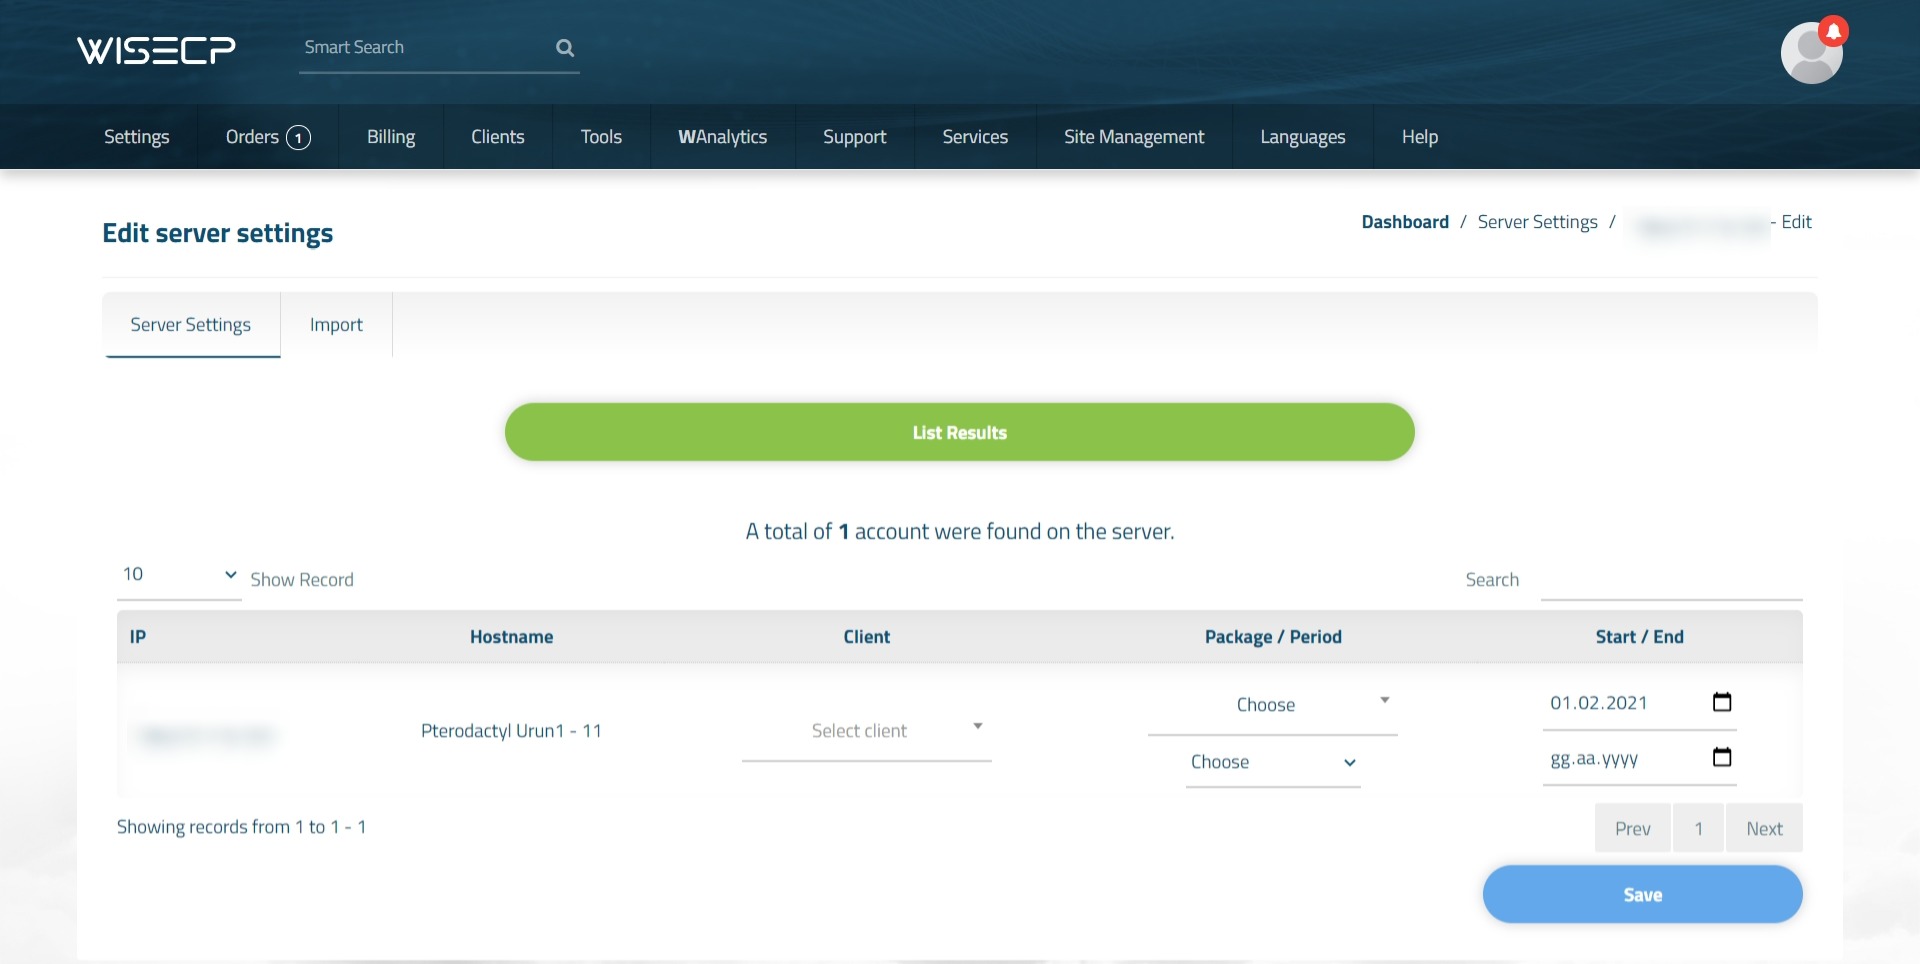
Since the "Client Secret Key" information cannot be obtained in the orders you have defined by importing from the Pterodactyl panel, you need to manually define the "Client Secret Key" information in the "Order Details > Core" tab.
Order Requirements and Additional Services
During the purchasing process, you can ask your customers to define some additional information, or you can offer additional services to your customers. These will function via API in conjunction with the module. For this, follow the steps below.
Identifying Requirement Information
During your customer's product purchase process, for example; server name, database amount, allocations etc. You can ask him to make such choices.
- Follow the path "Admin Area > Services > Service Management > Order Requirements"
- Click on the "Add New Requirement" button.
- On the page that opens, make definitions as follows.
Name : A title related to the info requested in the purchasing process. (For example: "Server Name")
Description : A description related to the info requested in the purchasing process. (For example: "Please type your server name")
Group : Select a group you created earlier. (For example: "Servers" etc.)
Related Service Group : Select as "Server".
Status : Select as "Active".
Sequence Number : Set a sequence number.
Mandatory : Mark if the additional information is "Mandatory".
Configurable Options : In this section, select a variable in the related module you want it to be associated with. The variable you select here will function on the module side.
Option Type : Determine which form element will be seen as the field where the information will be defined.
Identifying Additional Services
You can offer "PAID" additional services to your customer during the product purchase process. These are, for example: CPU, RAM, DISK, LICENSE etc. It can be in different ways.
You can access the helpful document on the definition of additional services via the link below.
