WTranslator
WTranslator is a paid and premium WISECP addon. It is purchased in addition to the WISECP license. In order to use WTranslator, your WISECP version must be at least “3.1.8”.
To purchase the WTranslator addon, please visit the link below or go to “my.wisecp.com > License Details > Additional Services”.
Go to the Online Store : https://store.wisecp.com/en/wtranslator
Content Map:
Installing
1) After purchasing the WTranslator addon, download your addon installation file and unzip it with any compression program (Winrar or 7-Zip) and extract it.
2) Access your WISECP software files via FTP and upload the extracted addon folder to the “/coremio/modules/Addons/” directory.
Activating
1) To activate the addon, please visit “Tools > Addons” from your admin area.
2) On the page that opens, find the “WTranslator” addon in the “Disabled Addons” section and click on the “Settings” button.
3) There are the following fields on the page that opens, and you must define this information according to yourself:
Translate Tool : Select which translation tool you would like to use for the translation process. There are 3 different options. These are Google Translate, Bing Translator and DeepL.
Type: If there is an account type related to the translation tool you have chosen, you can select it. For example: DeepL has Free and Pro version types.
API Key: Define the API key of the translation tool you have selected.
You can use the resource below to obtain the “Google Translate API Key”:
https://bit.ly/449LoE4
You can use the resource below to obtain a “Bing Container Endpoint URL”:
https://bit.ly/3xFrtR6
You can use the following source to obtain the “DeepL Auth Key”:
https://bit.ly/3Q80mo5
Access Control : Set administrator privileges to grant access to the addon.
4) After defining the above information, click the “Save” button and then click the Enable button at the top of the page to activate the addon.
Use and Working Principle
Wtranslator is extremely simple and easy to use. When a customer or website visitor who does not speak your language sends you a message in a foreign language, just one click instantly translates the text into your language. Also, when you send a reply to a message, you can type the text in your own language and it will be instantly translated into the sender's language with a single click.
Translating the Message in Support Tickets
When a support ticket is created in a foreign language other than the language you speak, a "Translate" button appears right above the message text. When you click this button, the message text will be instantly translated into your language.
If you wish, you can return to the original version of the text by clicking the "Show Original" button.
Replying to Support Tickets
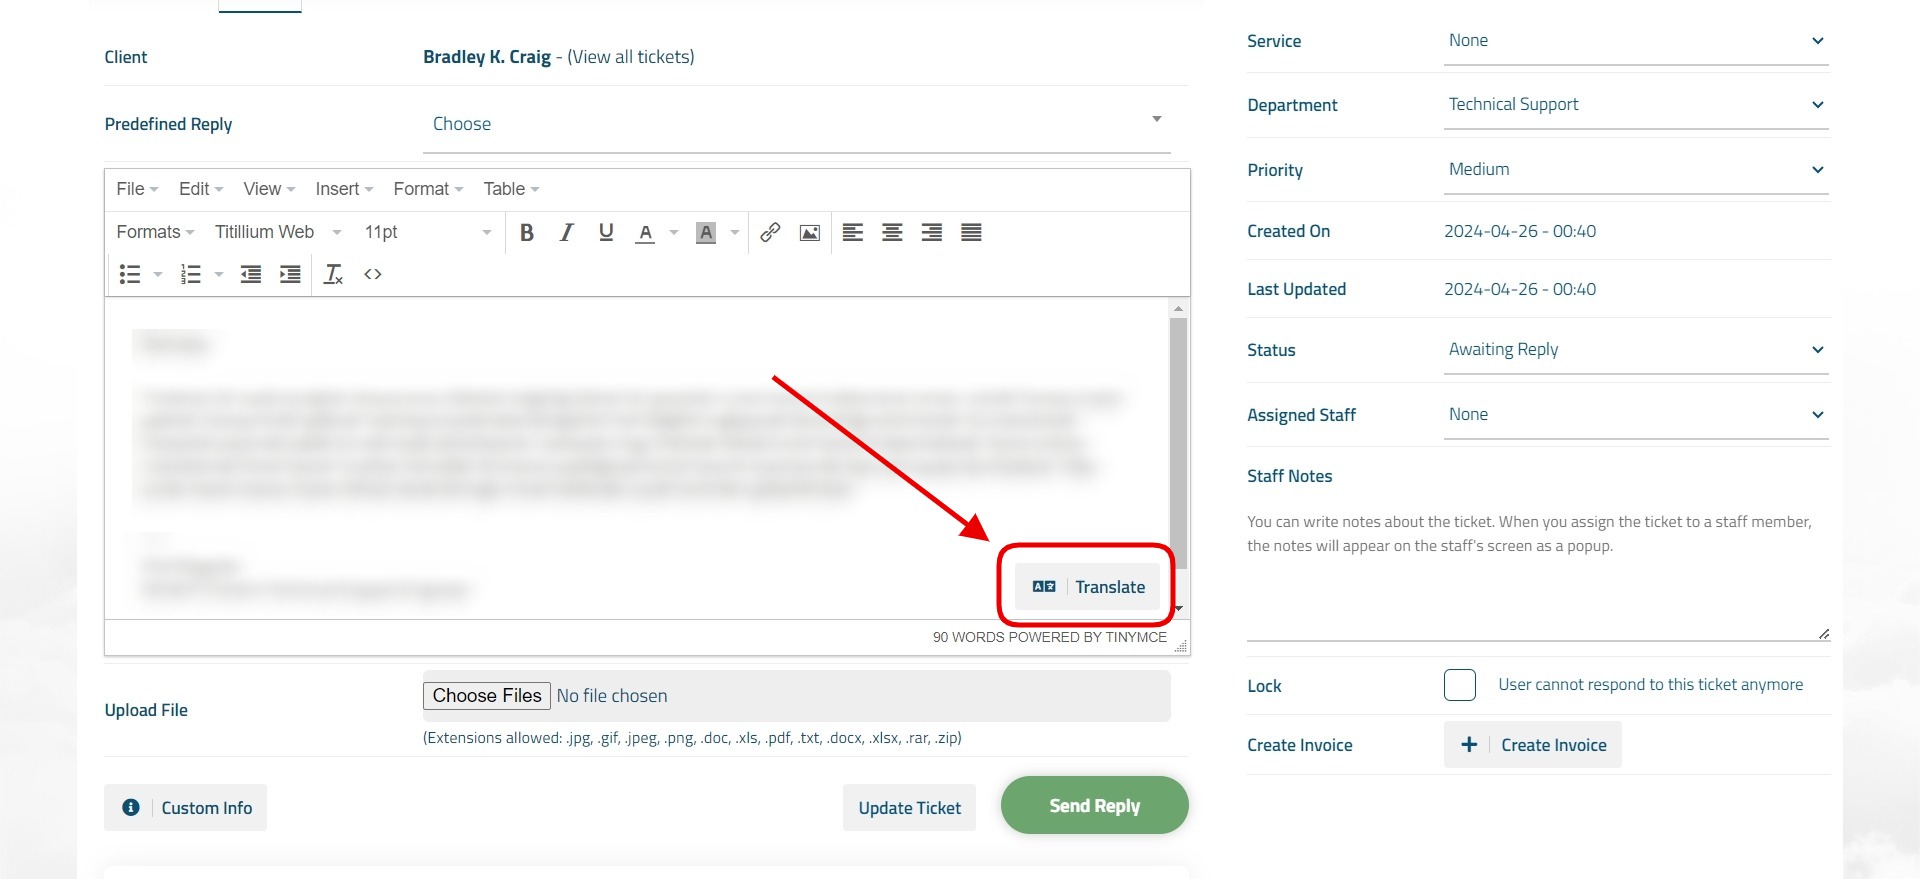
To send a response in your own language to a customer or visitor who speaks a foreign language, write a message in your language to the text editor in the support ticket detail and then click on the "Translate" button displayed in the lower right corner of the text editor. When you click on this button, the text will be instantly translated into the customer's language.
If you wish, you can return to the original version of the text by clicking the "Show Original" button.
Translating Contact Messages
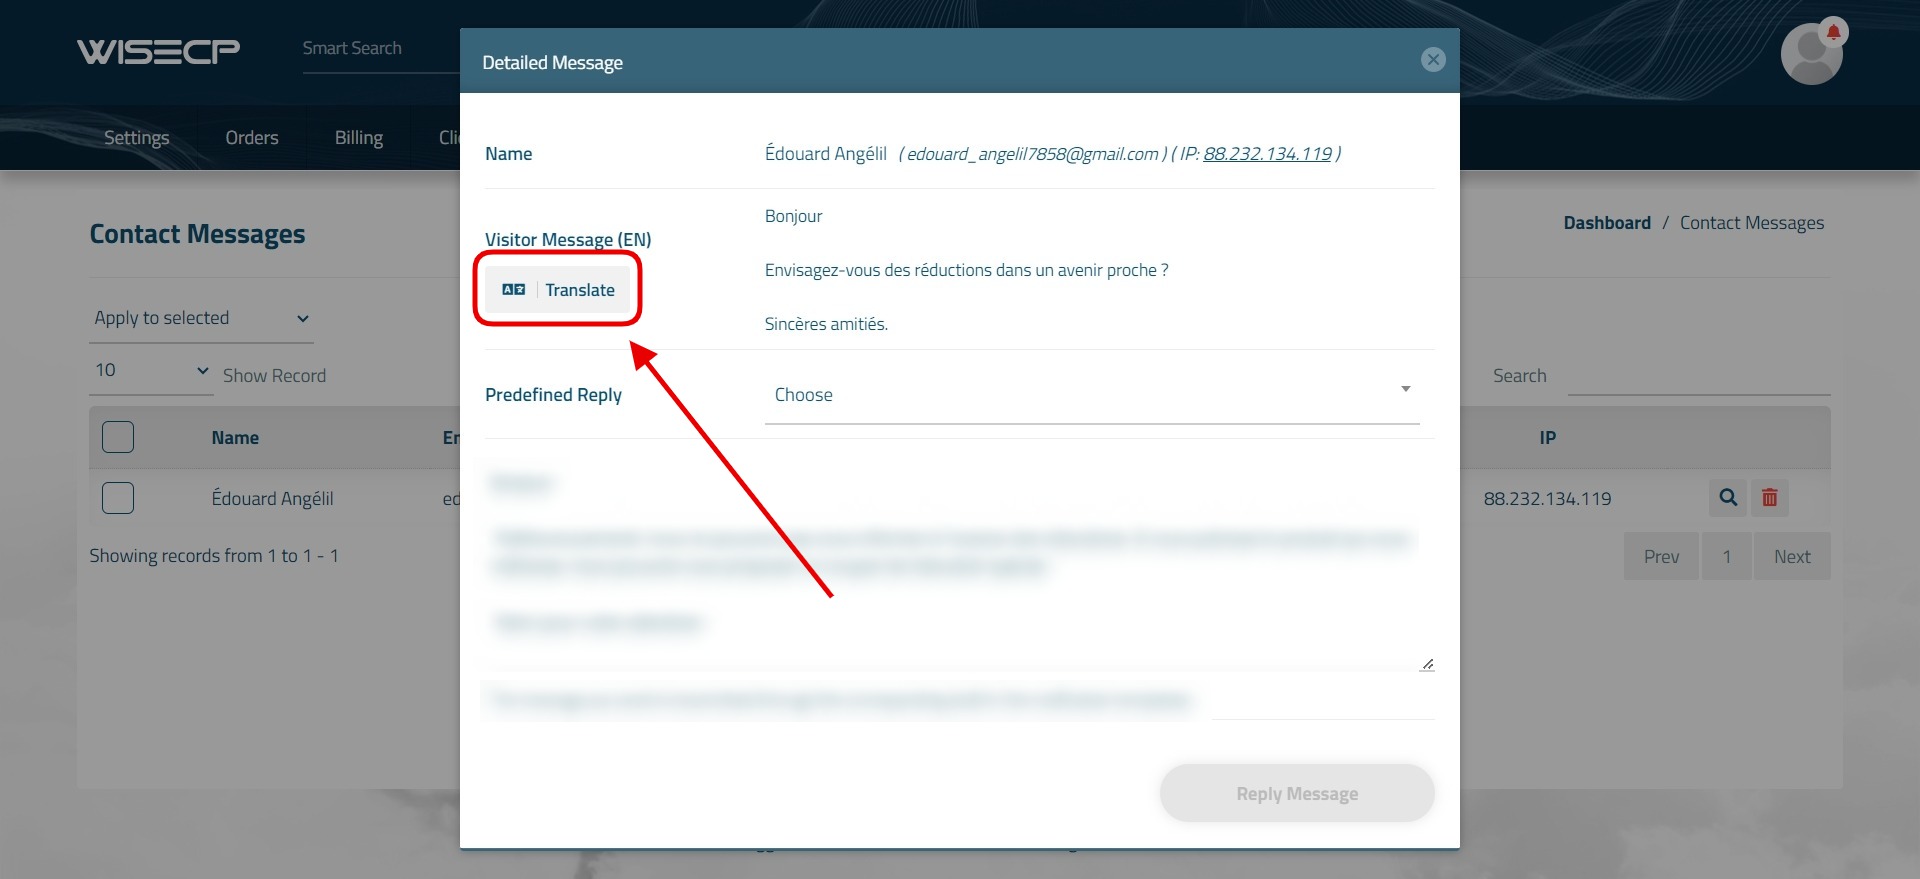
When you receive a message in a foreign language via the contact form, you can instantly translate the message into your own language by clicking the "Translate" button under the "Visitor Message" heading.
If you wish, you can return to the original version of the text by clicking the "Show Original" button.
Replying to Contact Messages
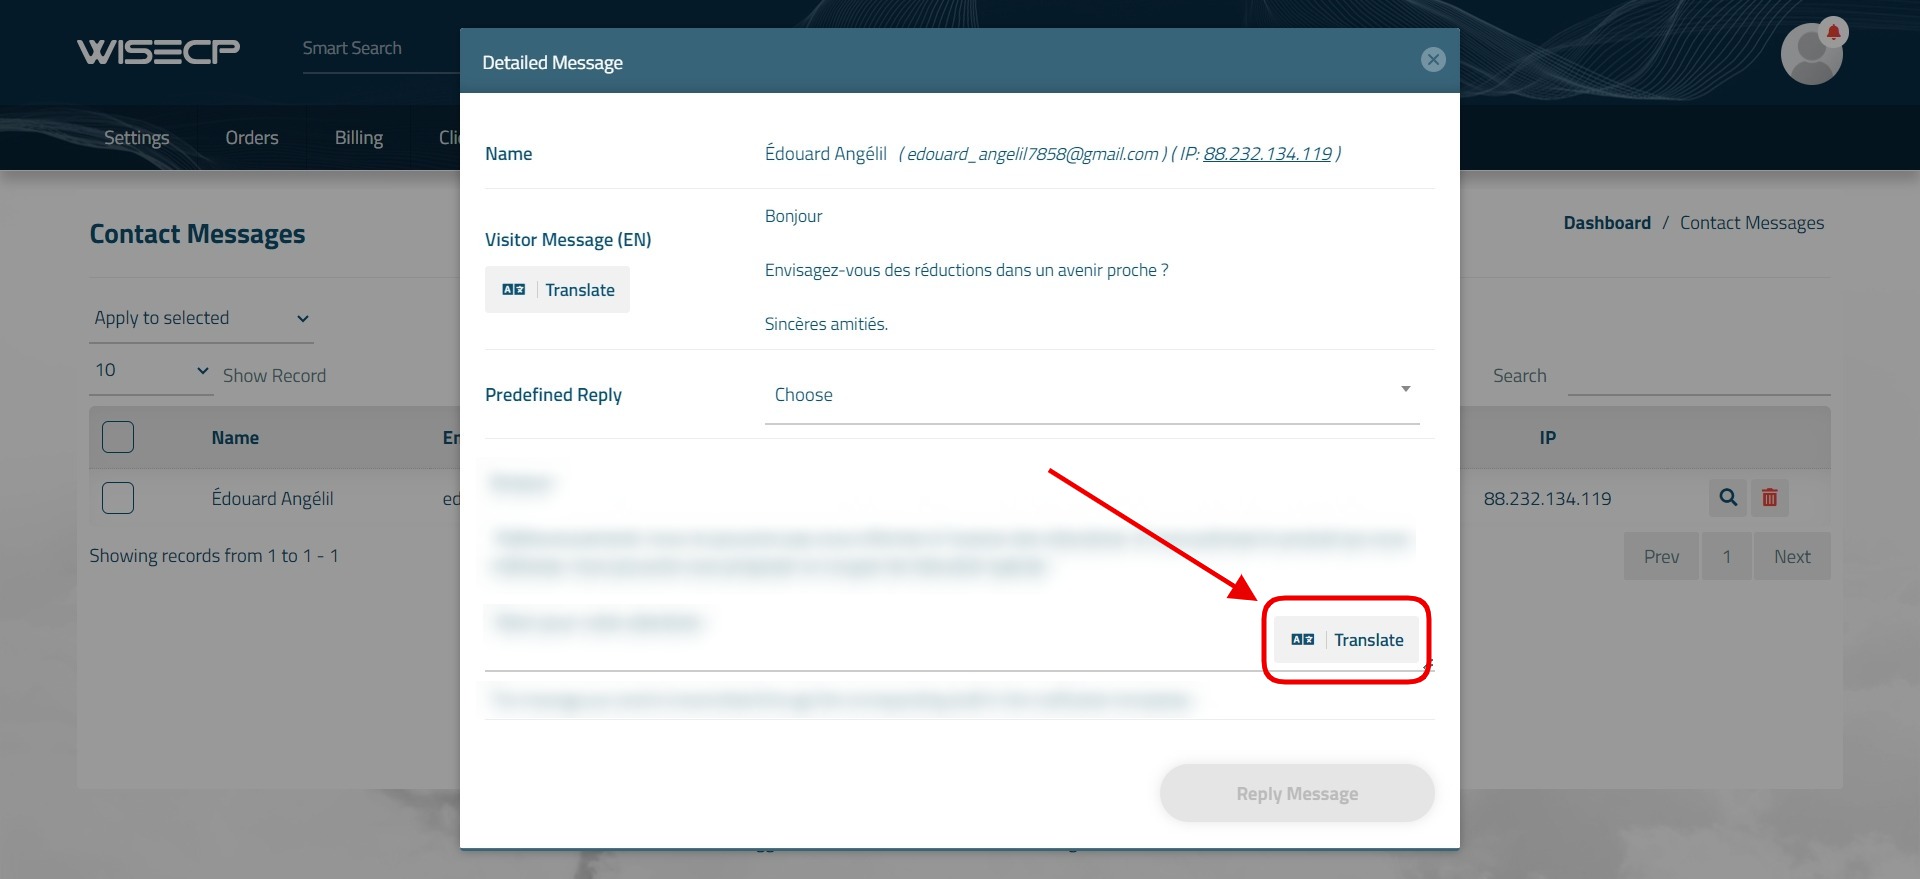
To send a response in the language of the visitor who sent a message via the contact form, write a message in your own language to the text editor in the contact message and then click on the "Translate" button displayed in the lower right corner of the text editor. When you click on this button, the text will be instantly translated into the customer's language.
If you wish, you can return to the original version of the text by clicking the "Show Original" button.

 Welcome to the Usage Guide


